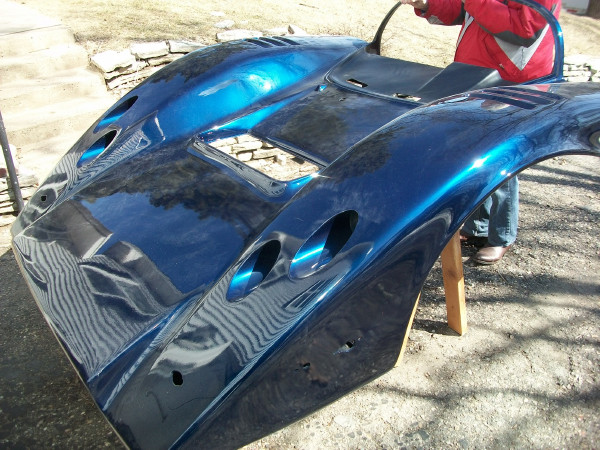
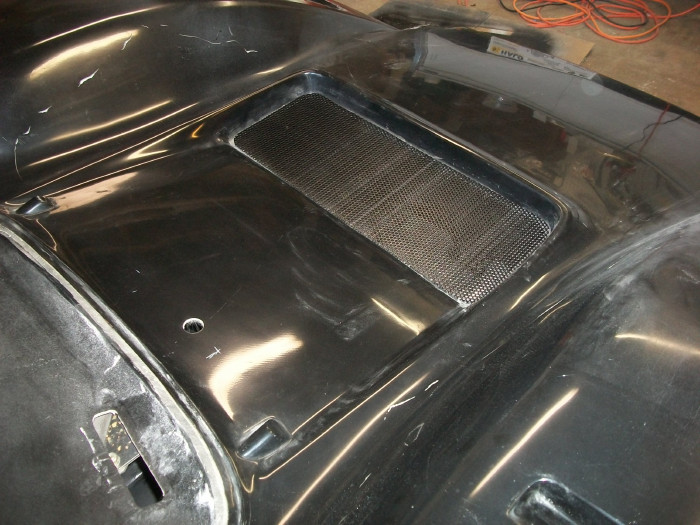
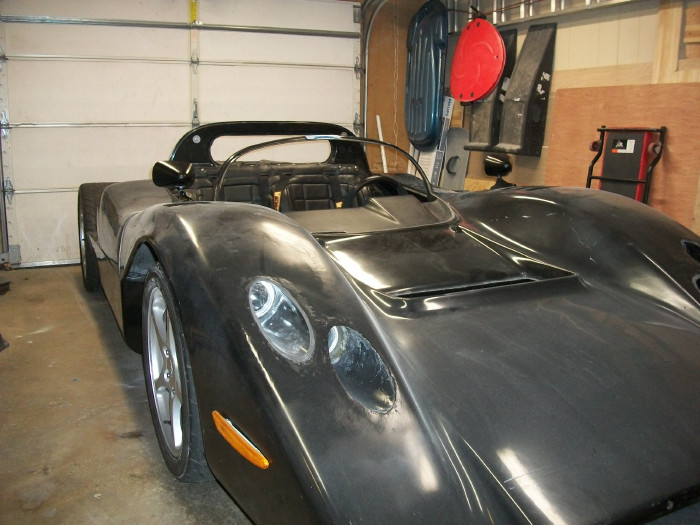
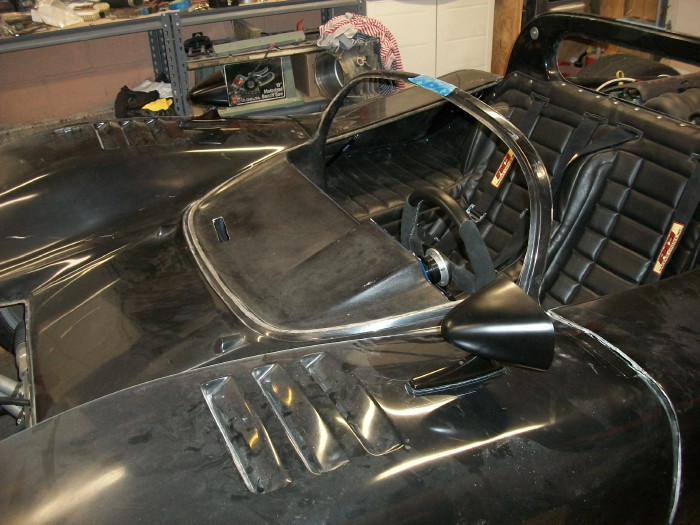
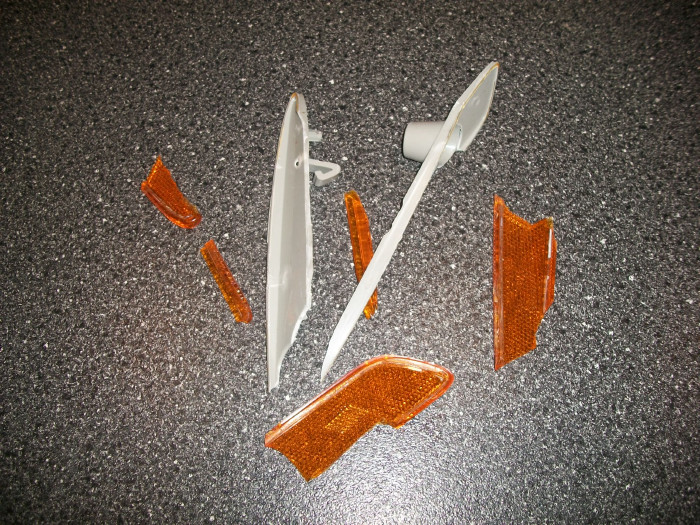
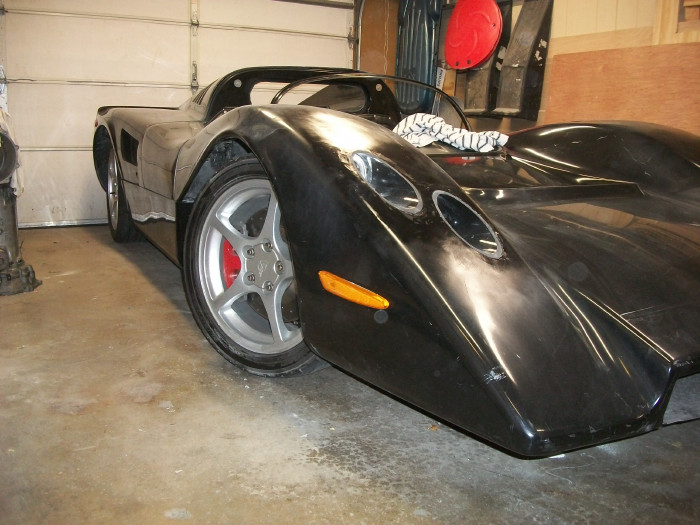
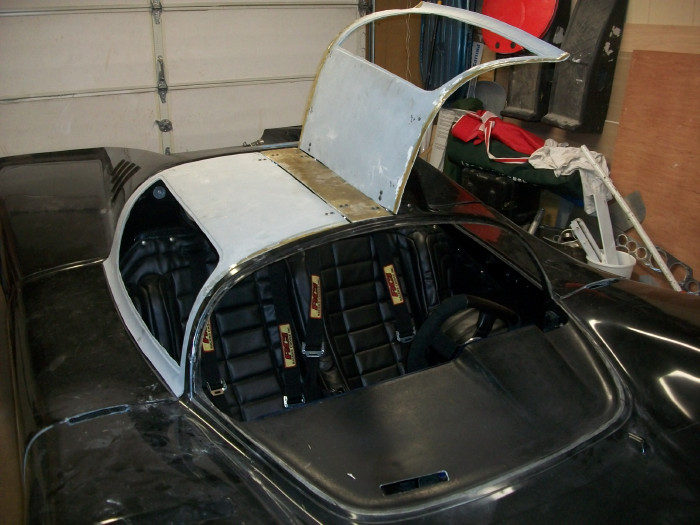
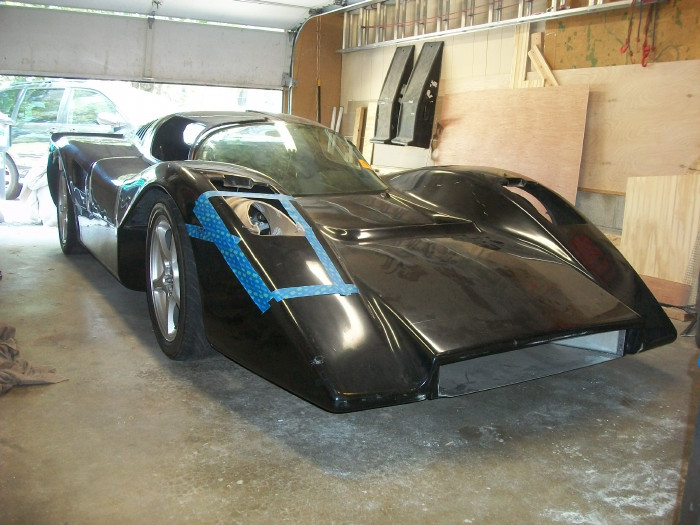
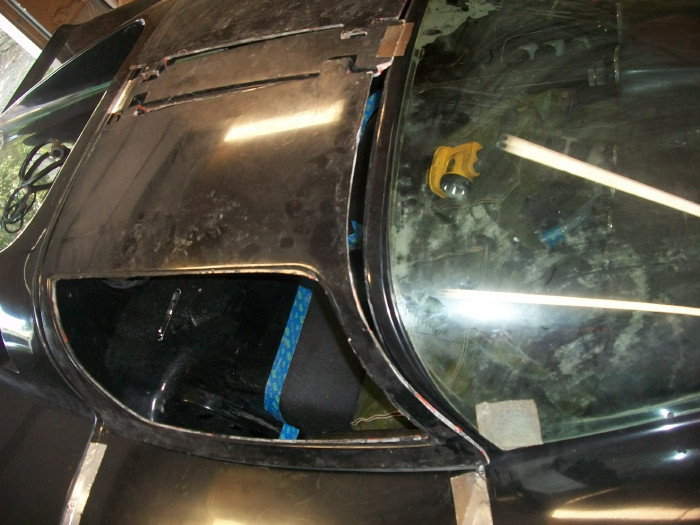
7-04-13 The Mirage has finally returned from the body shop. The scoop covering the engine cut-out needs to be buffed and mounted. The windshield is in and the wiper has been attached, new front turn signals will be installed (one went missing at the body shop), and a couple new minor issues need to be addressed (um, how do I jump start the car when the battery is dead and I can't use the electronic rear deck latches because the battery is dead...?). I'll try to get some new pictures in a few days.
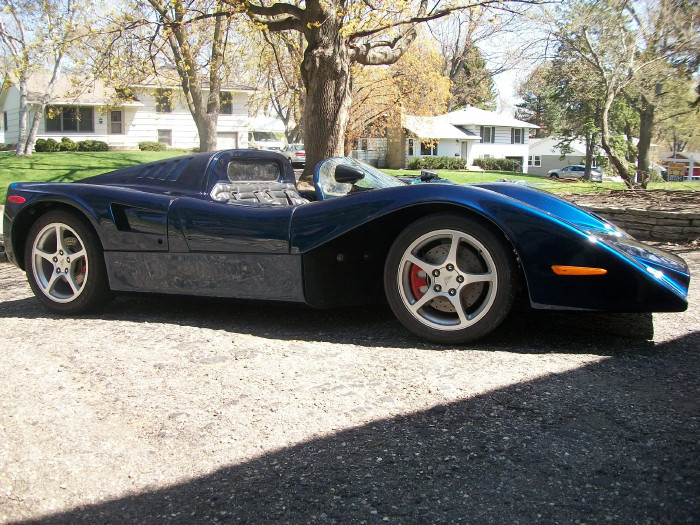
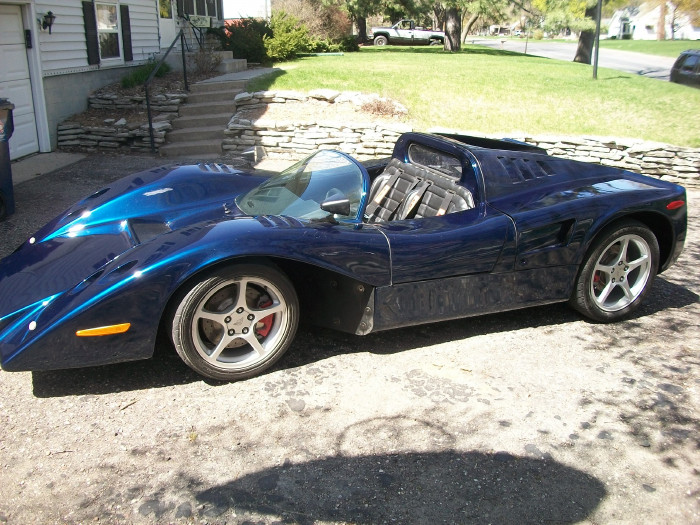
5-12-13 Took the Mirage for a short test drive today before heading back to the body shop for final paint work and complete buffing.

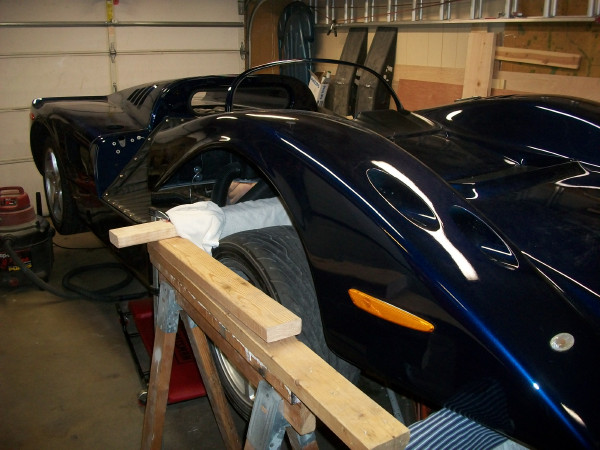
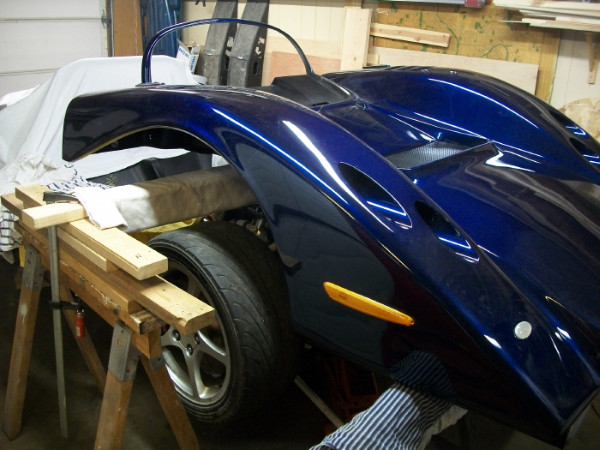
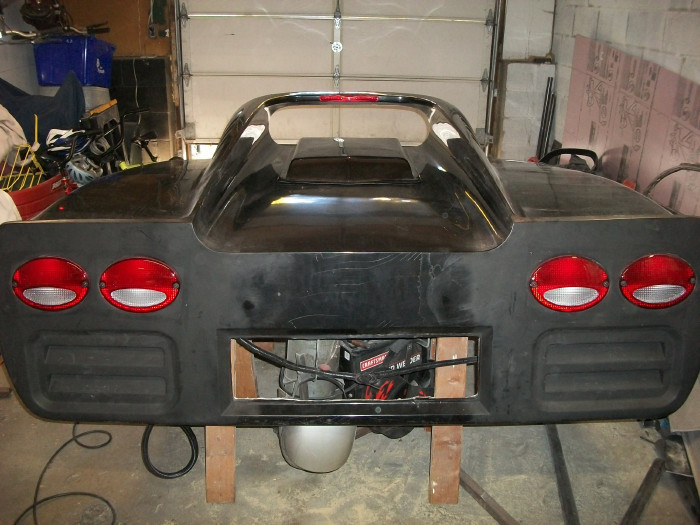
5-01-13 Almost done. There's just a few more things to tidy up before the car is ready to be touched up and buffed out.
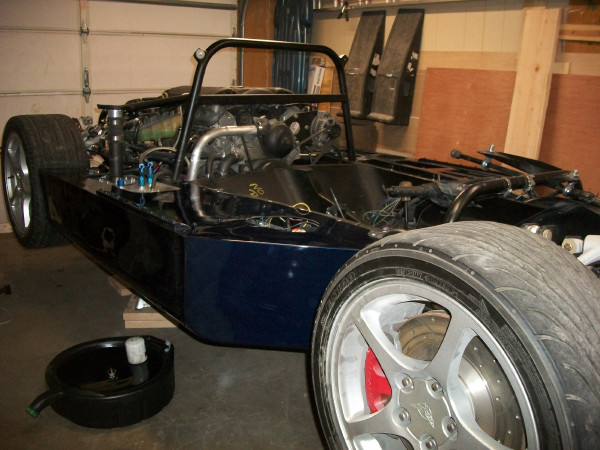
4-21-13 Front body semi-reunited with the chassis. It's propped up so I can access and test the wiring between the chassis and front body.
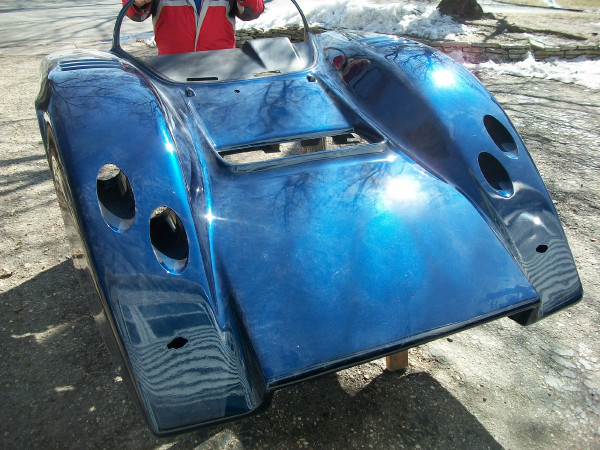
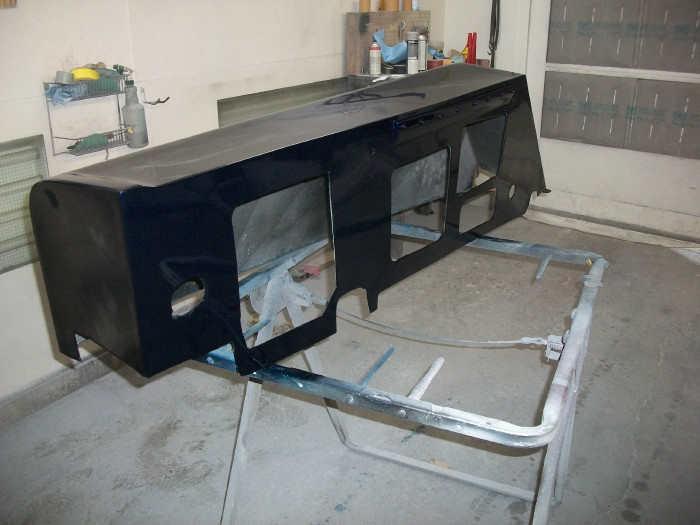
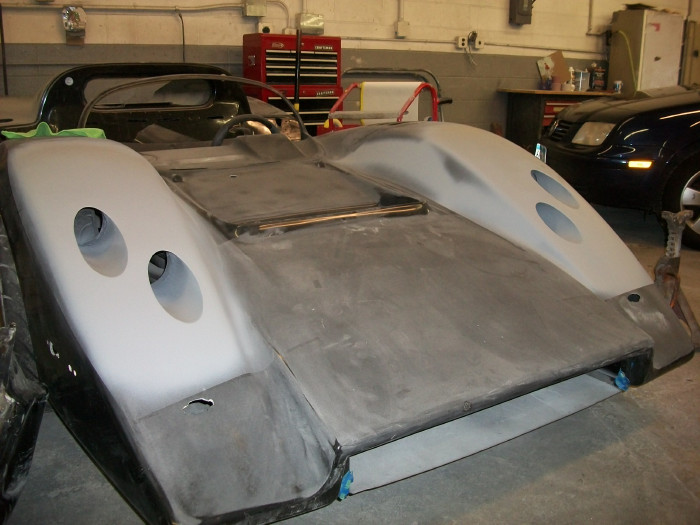
4-15-13 The rear body has returned.

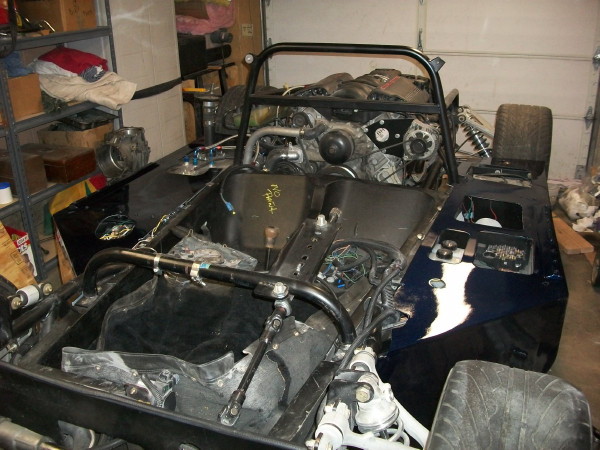
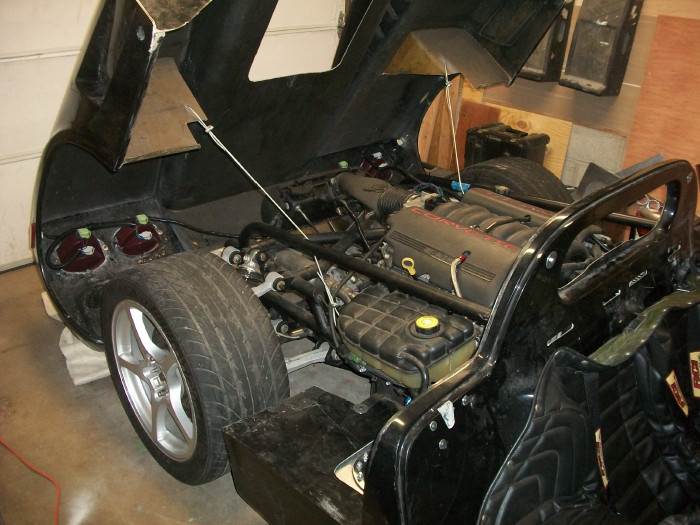
4-8-13 Reassembly has begun. The firewall has most everything installed and I'm on the process of putting dozens of items back on the front body.
4-4-13 Front body back at the garage and out in the sunlight. Like the side pods, this hasn't been buffed out yet (and it's a little dusty).
3-30-13 Front body getting some paint. The firewall is in the booth as well.
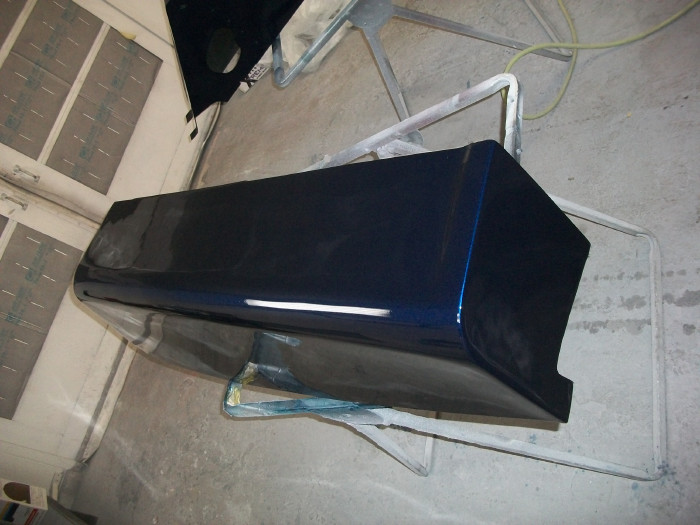
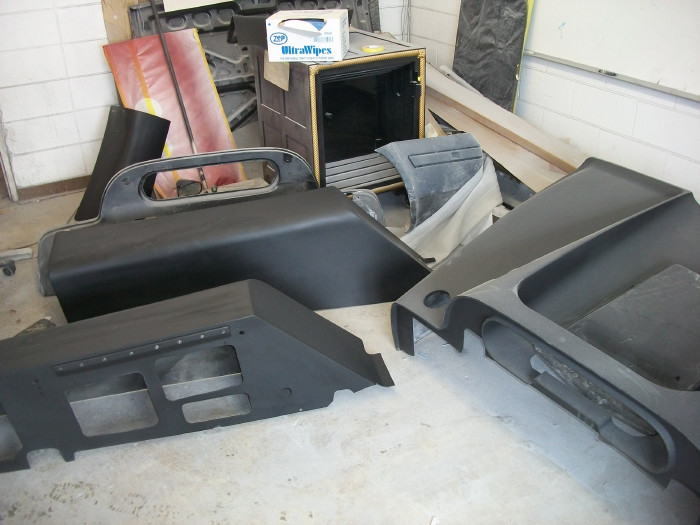
3-26-13 Side pods and doors are here. I decided to have the body shop wait and do a final paint touch up and buffing after the car was fully assembled. This way they can take care of any nick or dings I create while assembling everything and the smaller/lighter pieces will be easier to buff out when mounted on the car. It's too bad the lighting stinks in the garage. The blue paint looks really nice!
3-22-13 Re-PAINT!!!!! Four tiny holes in the side pods have been patched (after the side pods were painted - my mistake for missing them earlier) and the pieces have been repainted along with the doors. Just waiting for a few hours worth of buffing and they are ready to leave the shop. Crossing my fingers they will be back here tomorrow afternoon. The next pictures posted will be the side pods on the car. Stay tuned...
3-08-13 PAINT!!!!!!
Both side pods have now been hit with the first coat of paint. They still need to be sanded and painted a couple more times but they sure look good. Doors are next.
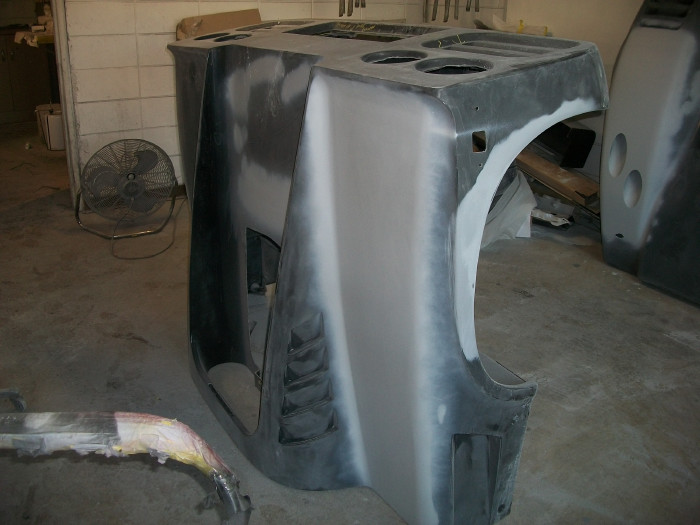
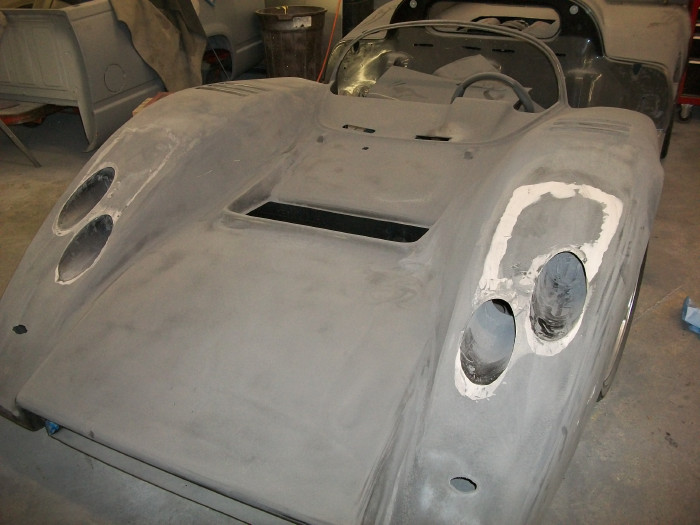
2-24-13 Last of the vents being cut out. Rear body, side pods, and lower doors primered. Front body and firewall should be in primer in the next couple days.
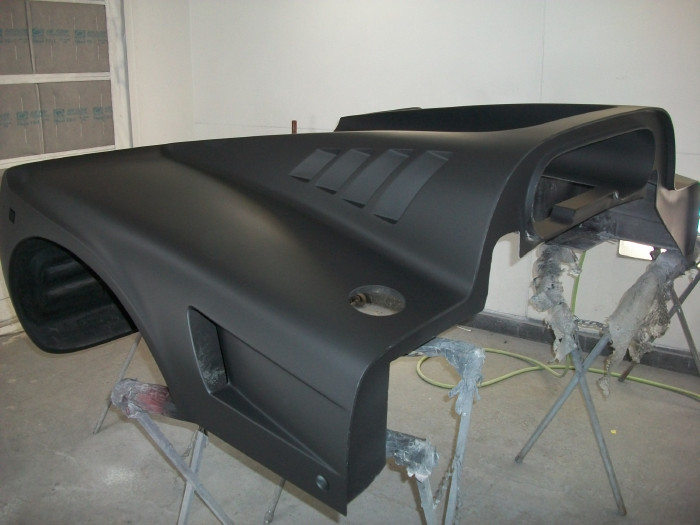
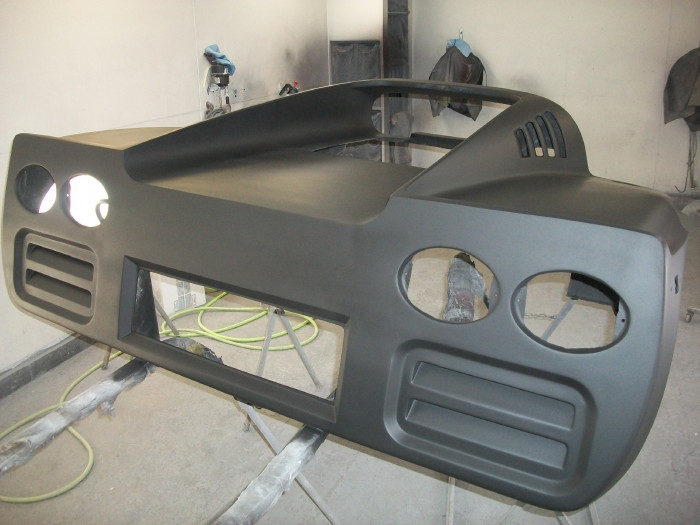
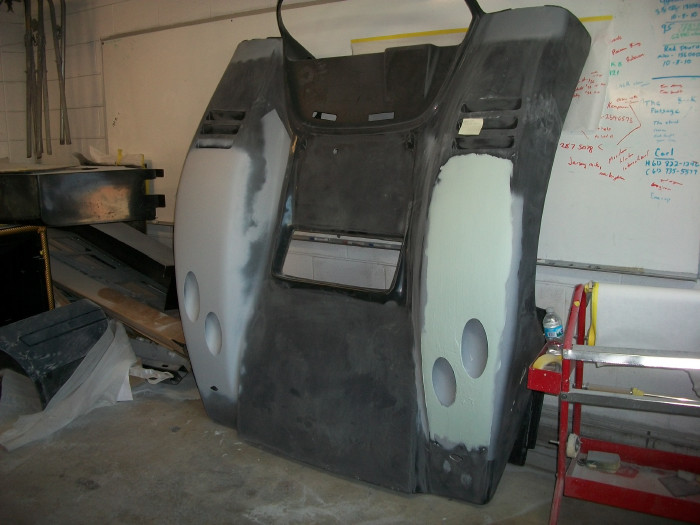
2-14-13 I was expecting gray primer, but black looks much cooler.
2-13-13 Front brakes are bled, parking brake cables are installed, and the rear body section has just been moved into the paint booth for the first coat of primer (I didn't have my camera with me, but will post pictures by the end of the week). Other than installing the belly pan, the chassis work is all done until the body is done being painted.
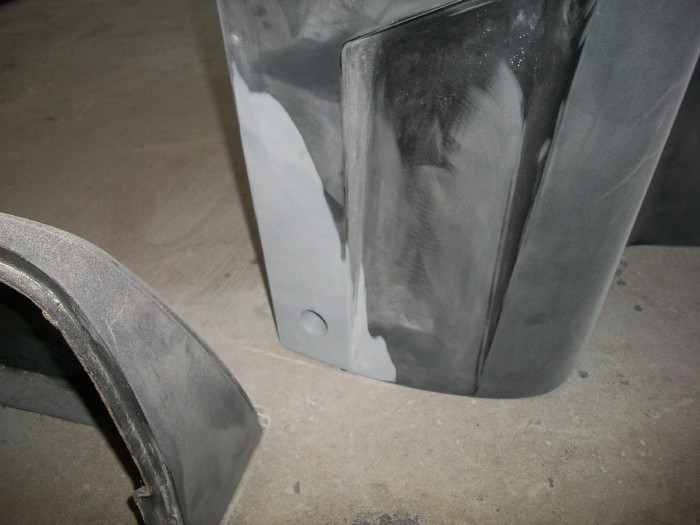
1-31-13 More progress on the body work. The chip in the nose is gone, the left front corner of the rear deck is squared up, the back vent area has been cleaned up and a few more small cracks and holes were discovered and patched.
01-28-13 New front master cylinder installed today. Still need to bleed the brakes and test (although I'm not sure how accurate the testing will be on ice and snow...stay tuned).
01-17-13 The nose is getting more smoothing along on the top of the fenders (I couldn't feel much of a lump, but the body guys could easily pick it out). The little Post-It Note on the driver's side vents: "GM - Indigo Blue". It's on a Post-It Note - can't change the color now!
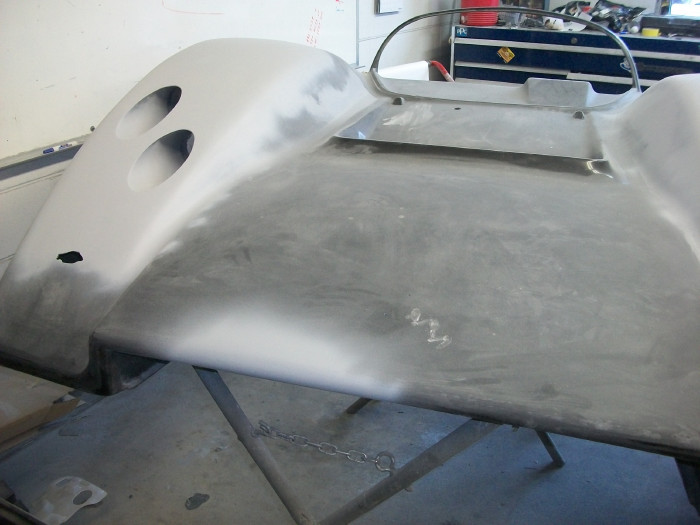
And work is turning to the rear body, repairing a cracked wheel arch and general smoothing of the top surfaces. If you looked at the rear body from the right angle, you could previously see where the inner fender was bonded to the outer body. Also the corners of the rear body were dinged up pretty badly from years of standing around on end. They're nice and square now.
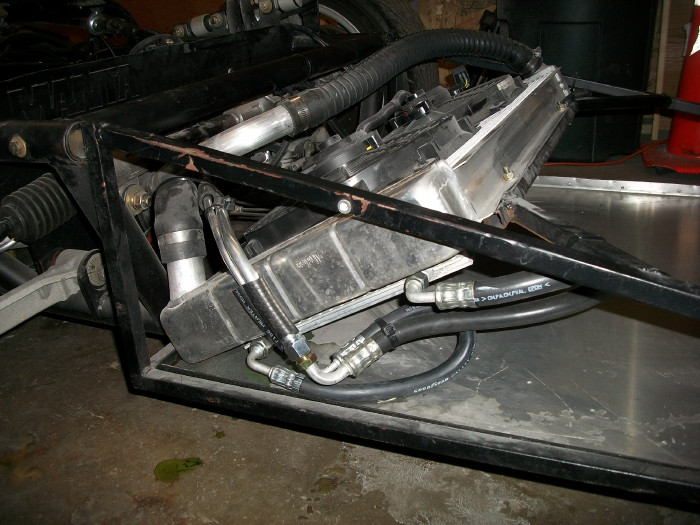
The A/C lines are all finished, pressure testing is complete, and the chassis is back here again. I'm trusting them that it blows cold - in my 45 degree garage, I won't be able to tell the difference :). They did turn up a bad blower motor which was gladly replaced under warranty by Vintage Air. I tried to get more shots of the nice work the A/C shop did, but everything is getting so crammed in and around the chassis is hard to tell what's what. The little puddle of coolant appears to be from some fluid getting trapped in between the aluminum pan and the nose frame work when the radiator was swapped out.
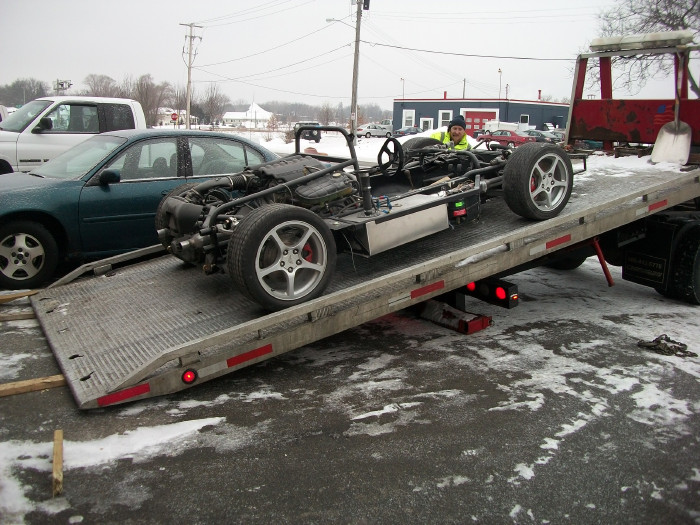
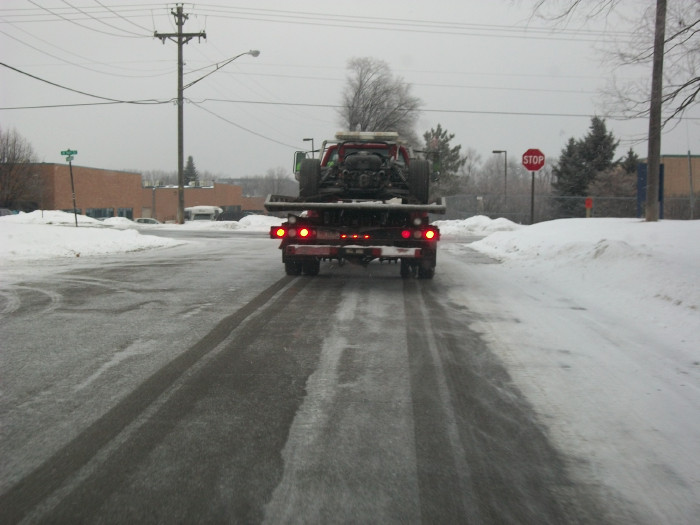
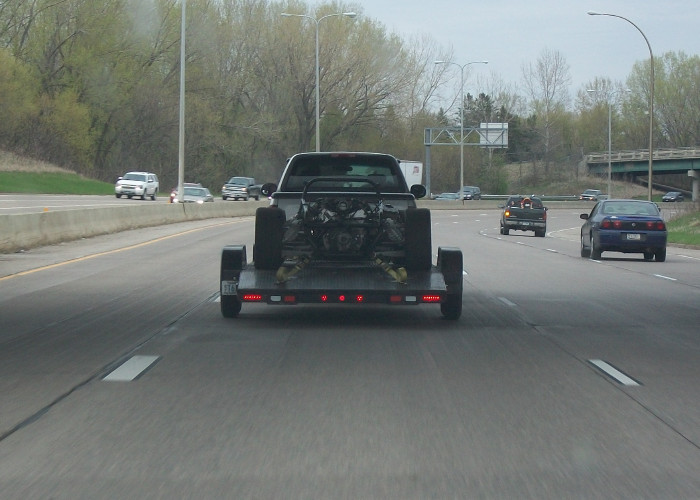
01-9-13 It was another snowy day as the chassis headed out for A/C work last week. We experienced no trouble at all loading it on the flatbed, which probably can be attributed to the fact that it's not sitting quite as low as it usually would with the body in place. It also helps to have an experienced hauler that knows how to set things up.
I also wanted to share a shot of the front vent piece that goes in the radiator outlet, but I can't seem to locate it at the moment. So here's a shot of the uncut and unpainted material.
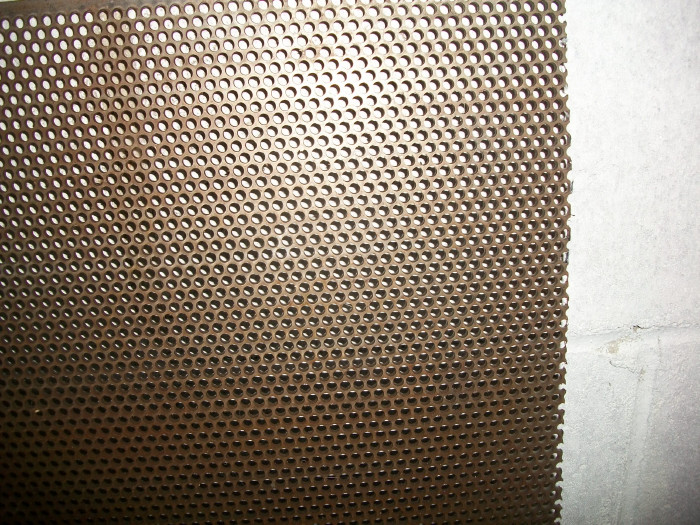
Oh, wait...if you scroll down to 10-31-12, there's a shot of it in place.
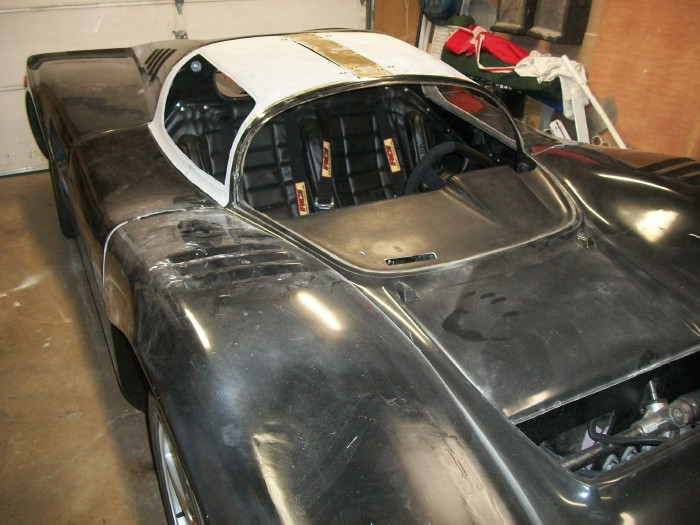
12-27-12 Bodywork is progressing slowly. We moved the car from one part of the body shop to another to separate the body from the chassis, ultimately to get better access to all parts of the body. It was snowing lightly as I drove around the building so I couldn't resist snapping a couple pictures. Somehow we didn't get any evidence of the massive donuts we were doing just before this :).
The chassis will be returning to my little "shop" in the next couple days and is scheduled to receive A/C lines and pressure testing next week.

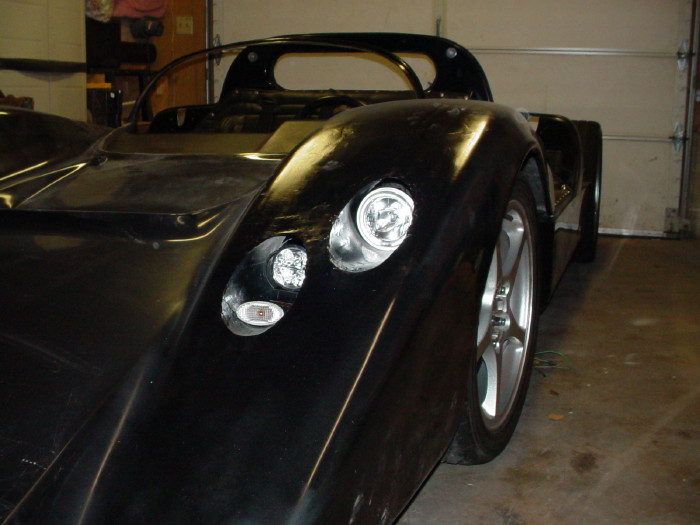
12-18-12 Headlights looking good.

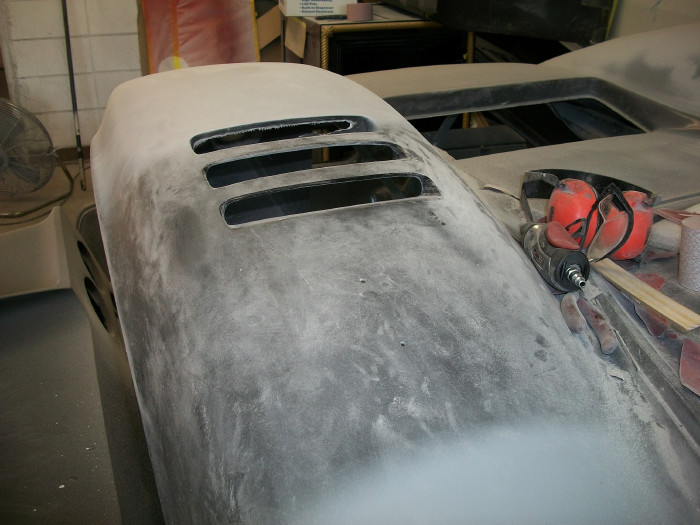
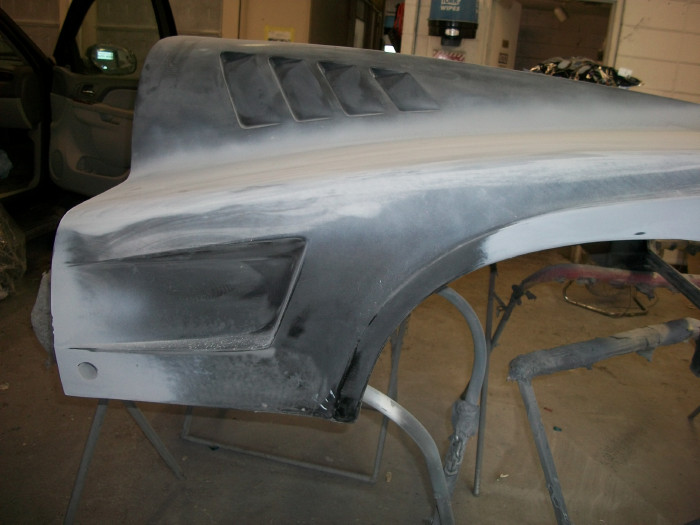
11-28-12 Finally seeing some action in the body shop. Starting on the front end with some serious sanding all over and smoothing of the headlight area. The gray is a thick coating of dust.
11-8-12 The Mirage has gone off to paint! While the body is being painted, the chassis will get some work of it's own - A/C lines, a new brake master cylinder, and a few other minor updates and additions.
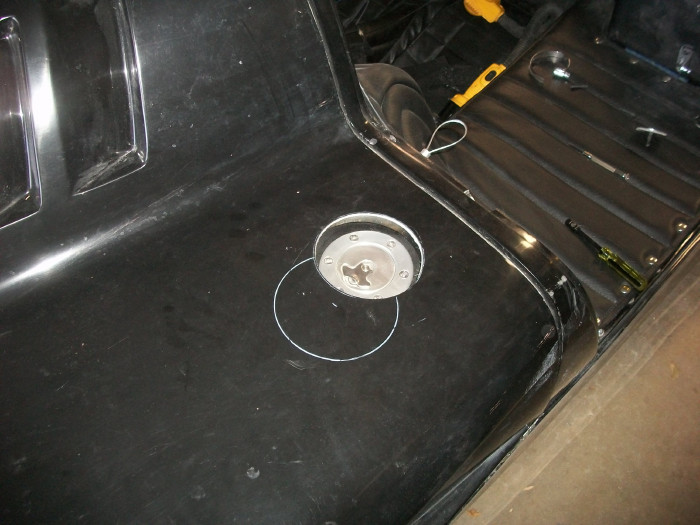
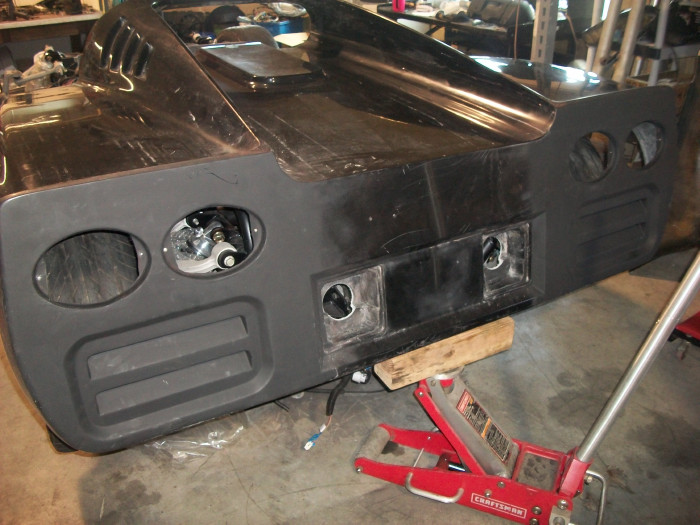
10-31-12 Front vent and gass filler with rear body closed.
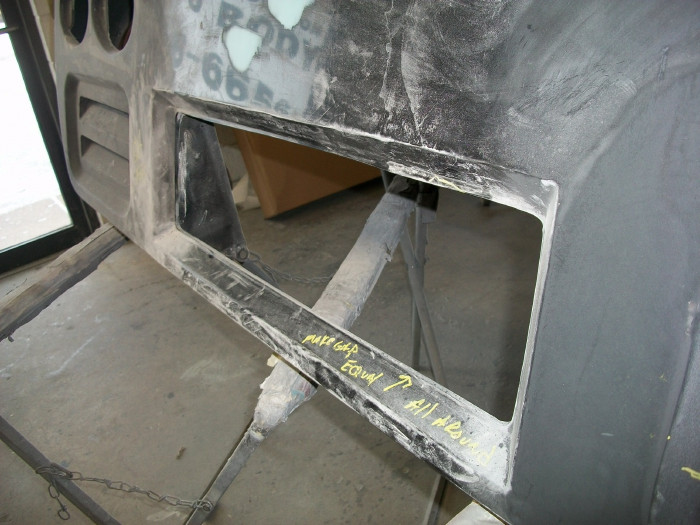
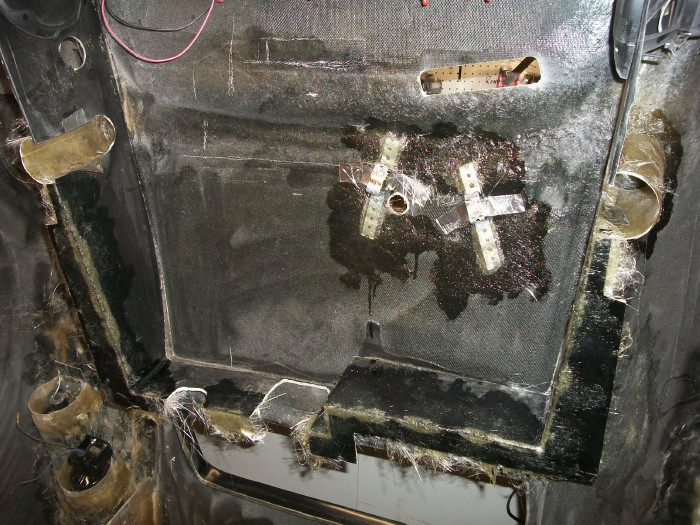
10-30-12 Some fiberglass work on the underside of the nose before the car goes off to paint - wiper motor brackets and reconstructing the flange around the footwell to help seal the cockpit.
10-23-12 Side mirrors are mounted. Gas filler is mounted. This will allow filling the gas tank when the body is closed.
Off to paint soon - disassembly of various components has begun.

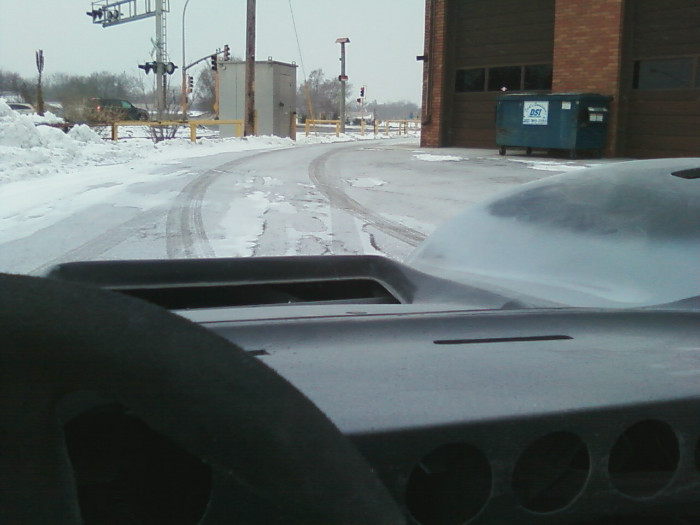
10-21-12 Tip of the day: Before taking your car out for a drive, no matter how brief, be sure everything is secure.
10-09-12 Lower doors now standing upright on their own. Finally found a suitable third brake light to install in the wing over the back window.
Over the last week, we've had an abrupt change in weather which has wreaked havoc on my fiberglassing technique. A couple smaller pieces had to be remade numerous times as they were not curing properly. I finally got the resin:hardener ratio corrected along with adding a little heat and am back on track. More work on the t-bar and upper doors but nothing worth photographing - layer after layer of fiberglass and some trimming here and there.
09-30-12 It's been way too long since the last update. The inner doors have now been bonded to the outer skins, the gas filler opening is glassed in the rear body, front side marker lights are in, the transaxle has been opened up and sealed again, the lower doors and rear deck have working latches, and a pile of parts are on the way to help finish this thing up. Not too many pictures to share since much of the recent work has been fiberglassing stuff, but here goes.

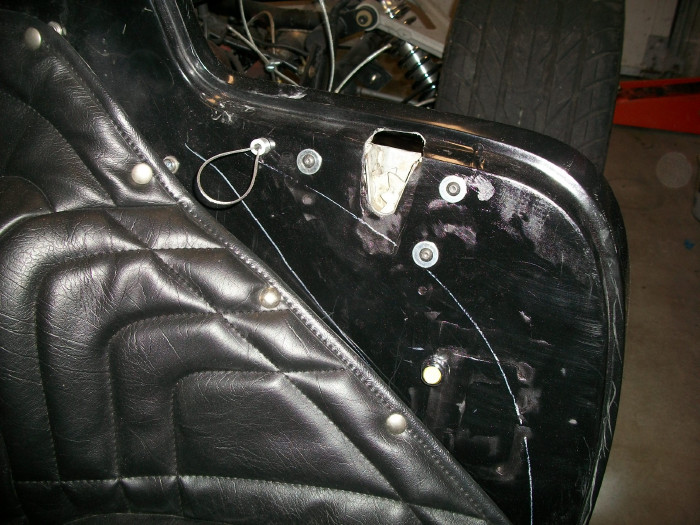
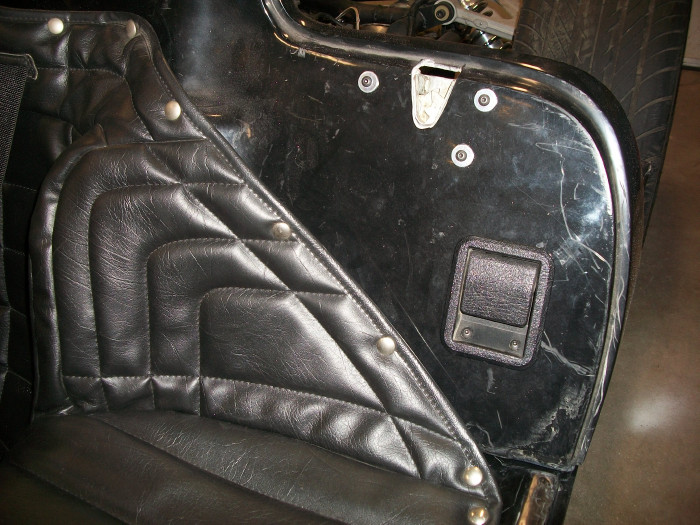
An updated shot. Lower door releases are in place - see wire loop to left of latch. Crude, but effective - a throw-back to old race cars or the Ferrari F40 door release. The button to the lower right is the electronic release for the rear deck. There's a matching button on the passenger side so the deck can be opened from either side of the car. The push buttons will be replaced by covered toggles since I discovered that when getting in and out of the car, one tends to bump the buttons and release the deck. No good.
From track day...
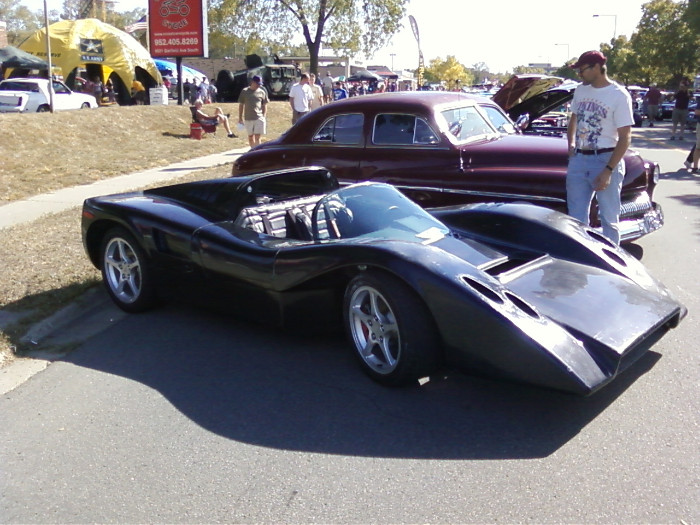
Car show on 9-15-12. Needless to say, the Mirage gots lots of reactions and questions. Only one person knew what it was. Lots of kids walked by saying, "Look it's the Batmobile!" Perhaps that will change when the car is painted Indigo Blue. The car was trailered to the show, but as I was leaving I found a new best friend in one of our local police officers who granted my request to drive the Mirage 2+ miles back to the garage (remember - no title, no insurance, lots of busy streets). The car performs as well on the streets as it did on the track. Unfortunately I had only my cell phone for pictures and no video for the drive.

08-22-12 More work on the upper doors. New ones were used so I could adjust the curvature. The old driver's door wasn't too bad, but the passenger side was quite off. A new T-Bar is in progress as well. Hinges are installed to test the fit. Plenty more fiberglass work ahead.

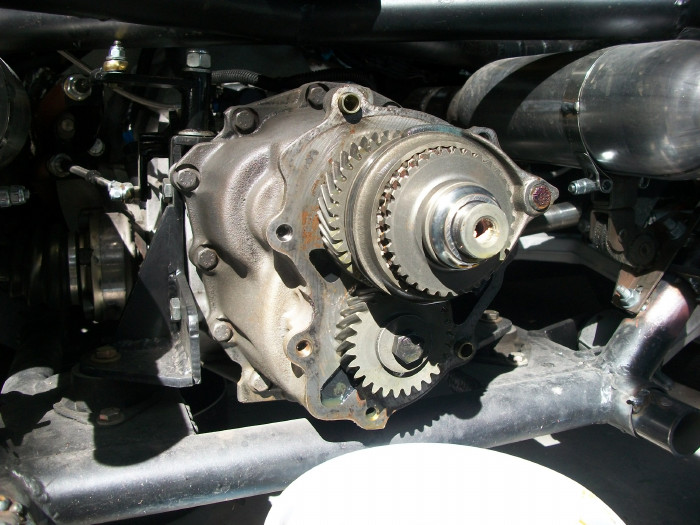
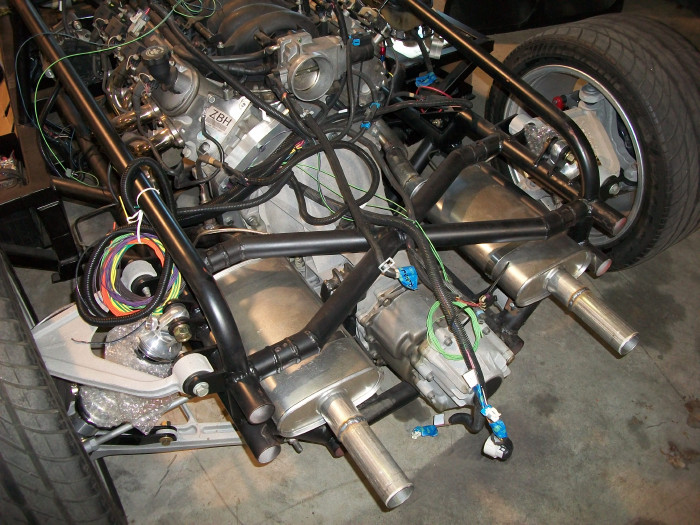
08-20-12 Track day apparently got the transaxle a little excited and it started peeing all over the place. I didn't notice it until a day or so after the fact, so there was a bit of a puddle under the back end. Today the transaxle fluid was drained, the back end came off and new coating of RTV was applied. Afterward the trans was filled up with fresh lube. A shot of the gears in the back end. For a 30 year old transaxle with an unknown history, it doesn't look too bad.
08-10-12 Headlights mocked up. Nothing mounted yet and more body work needs to be done to smooth things out, but this is close to the look we're headed for.
08-09-12 Track day!!!
The car handled beautifully - what more can I say?
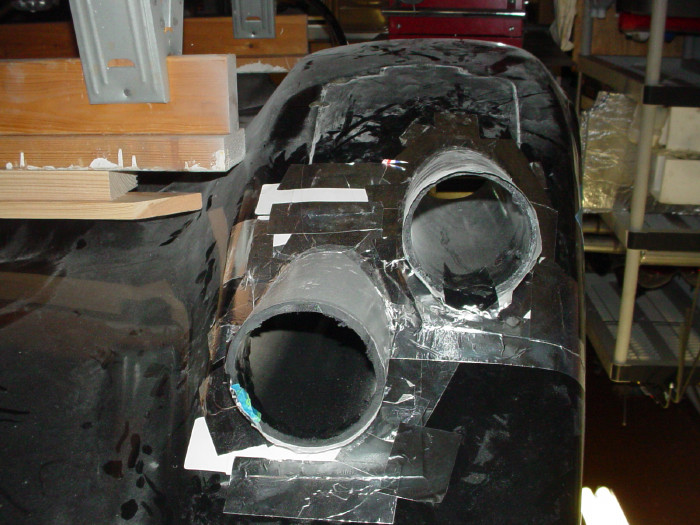
08-03-12 Made some progress with the headlights. The buckets/tubes are taking shape but still need plenty of work on the outside surface. At least at this point one can see where we're headed with the design. 4" diameter ABS tubes were wrapped in wax paper and secured in place with foil tape and a bit of plywood. A few generous layers of fiberglass mat and resin were applied and when that was dry, a quick coat of black spray paint was added to make everything blend together better.


07-31-12 Fiberglass work today - making the old pop-up headlight covers part of the body and glassing in some metal plate to the rear body to attach latches to.
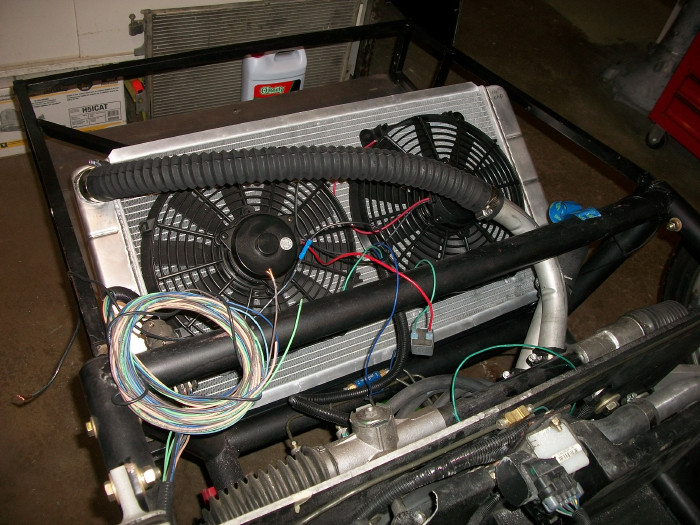
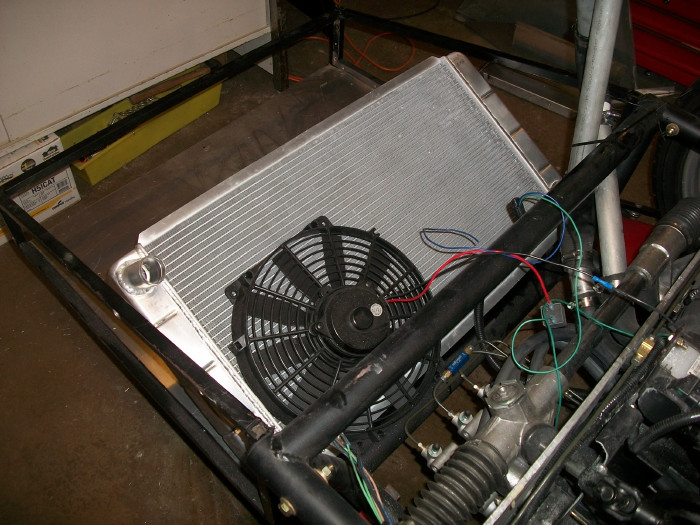
07-25-12 New radiator, A/C condensor and dual fans installed and hooked up. Fluid is in the system - just needs to be started to pump it through.
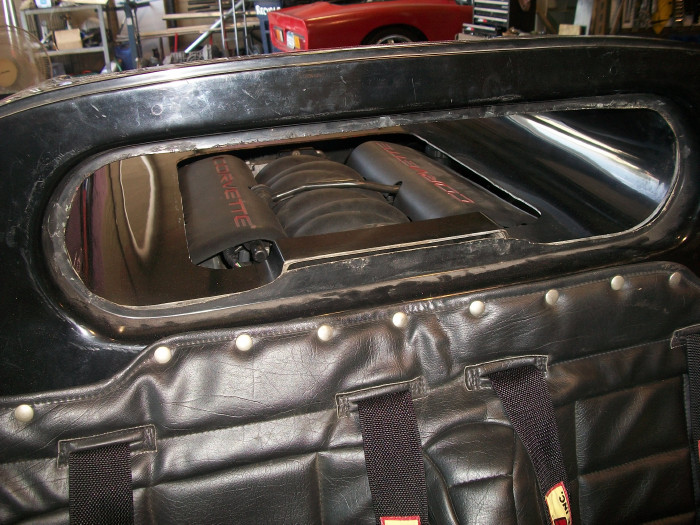
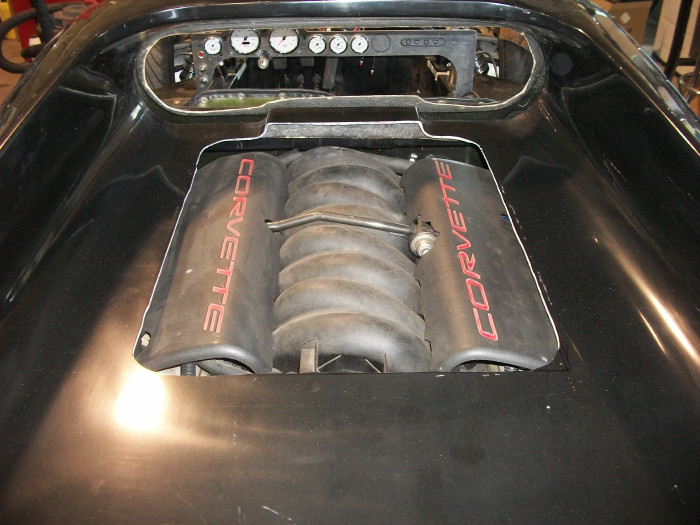
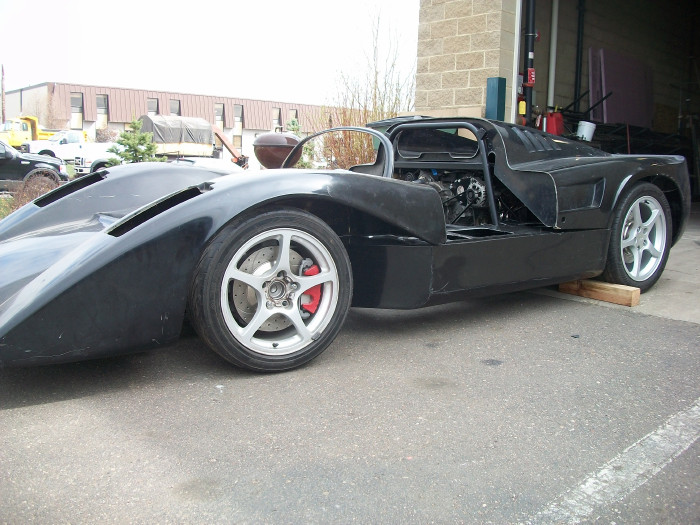
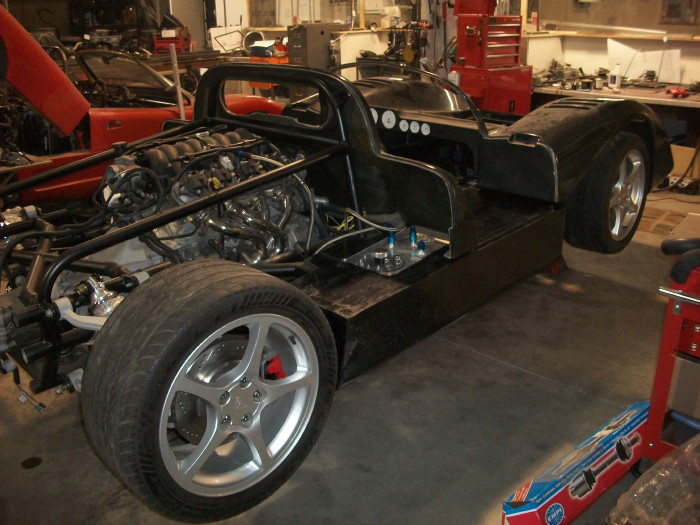
07-23-12 New hood scoop? It looks taller in the pictures, but only stands 1 1/2" tall - just a little something to cover the hole cut to clear the LS1.

07-20-12 Lower doors now have working hinges and will stand up with a carefully placed screwdriver as a prop. Alignment is still off, but we'll keep working on that.
Something is missing here.
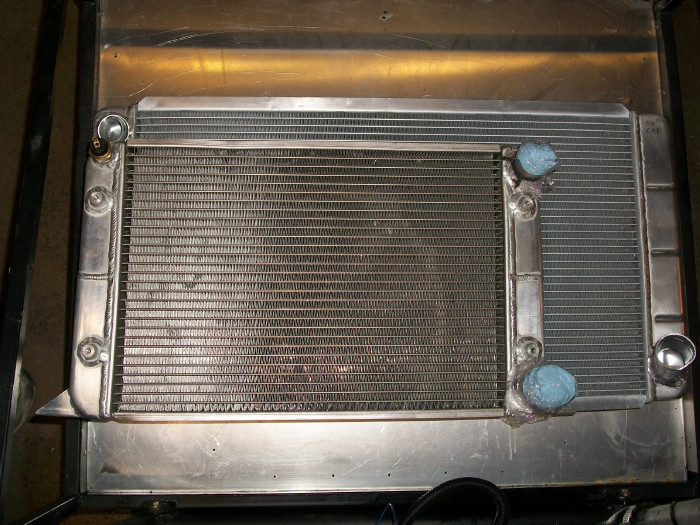
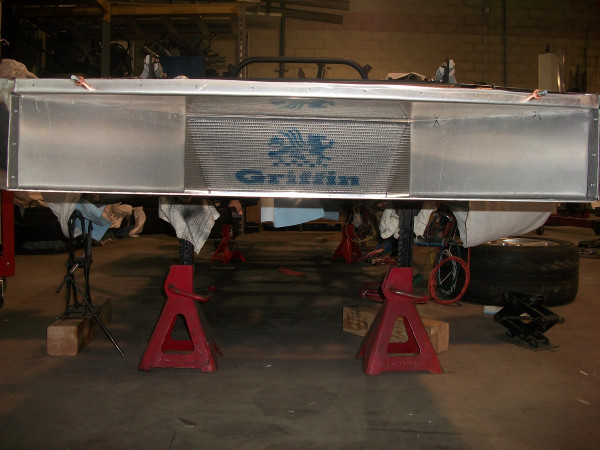
Comparing the new radiator to the previous one. The new radiator is slightly smaller than the original Corvette radiator, but total cubic inches is about 50% greater. One more fan just like this one will fill up the surface nicely.
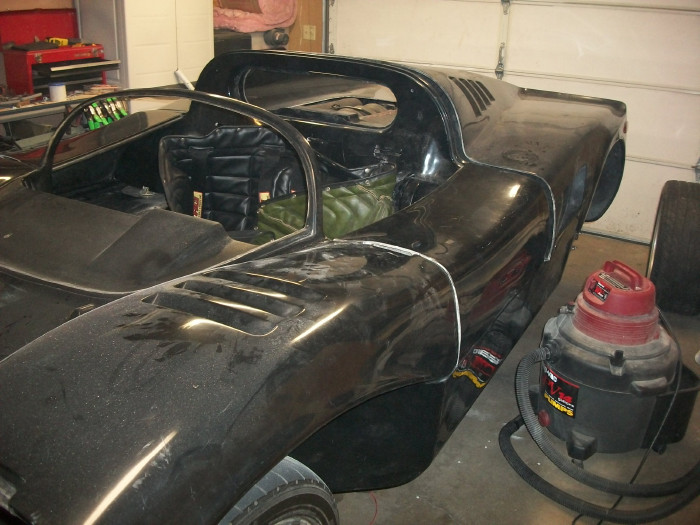
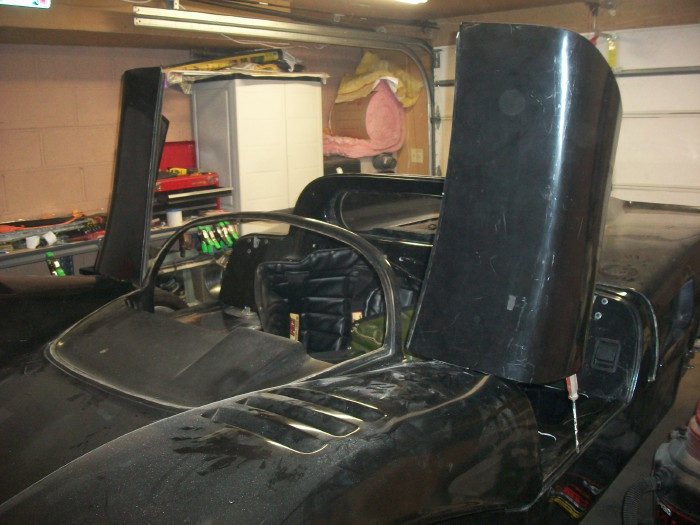
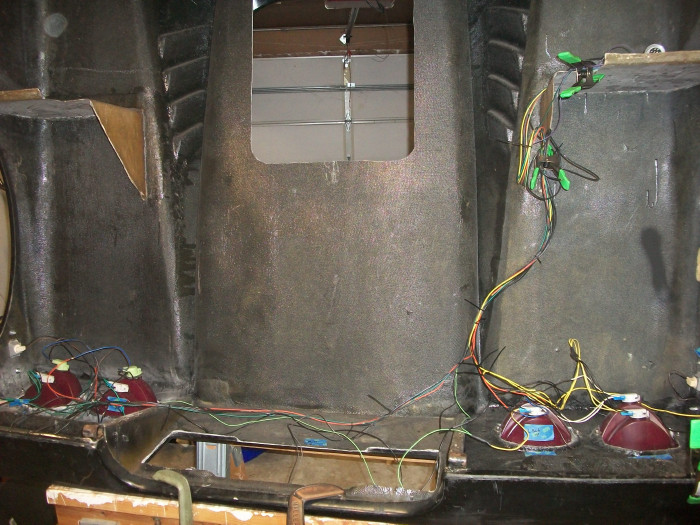
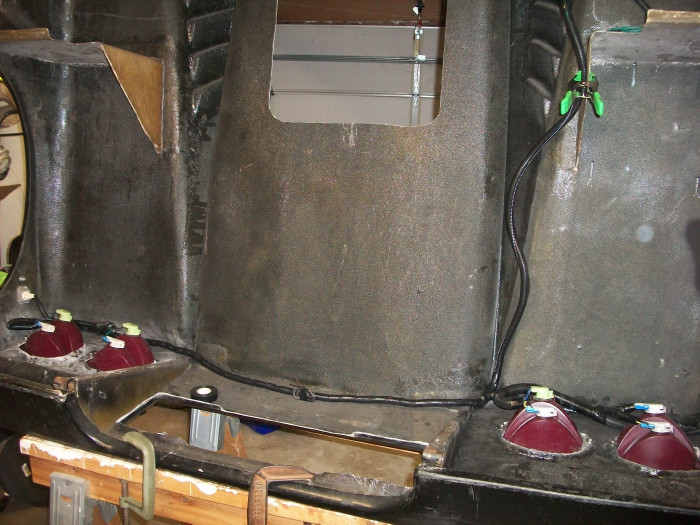
07-16-12 Rear body mounts are tacked in place along with some cables to make sure it doesn't tip back too far and wreck those new tail lights. Life has just gotten a lot easier with the mounts in place - no more balancing the rear body on towels, no more needing to tuck it out of the way, etc. Just flip 'er open!
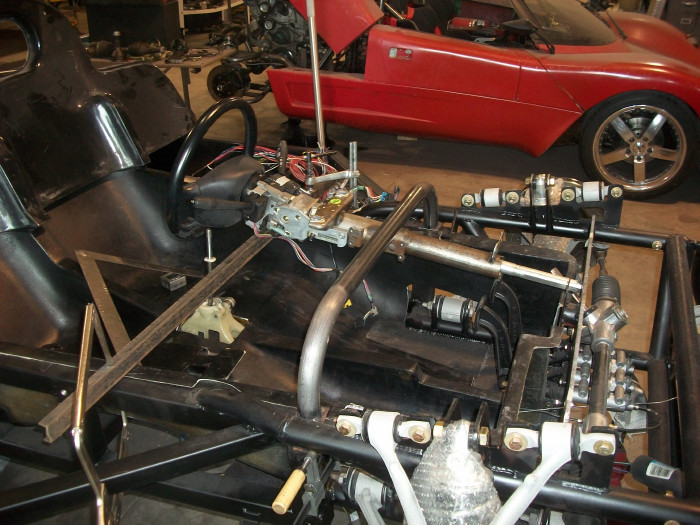
Parking brake handle is now nestled under the dash. It may be a slightly unorthodox location, but there's too much stuff running between the seats to put it there and no space to the left of the driver.
07-10-12 Fitting the body to the chassis this week. Some pieces fit together nicely, some not so much.

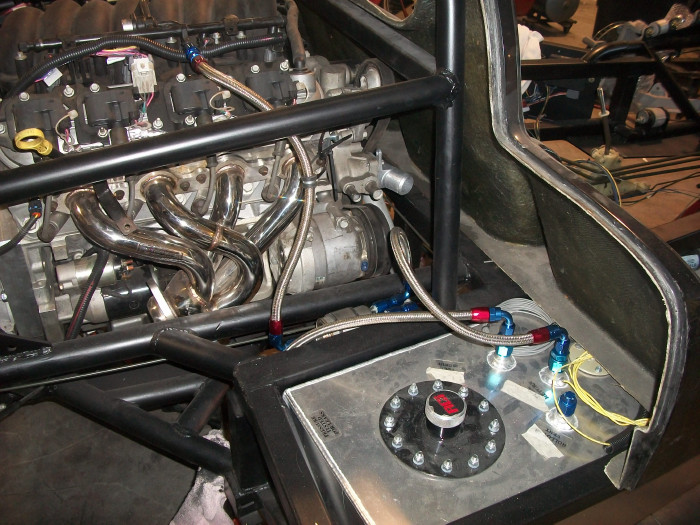
07-05-12 More wiring completed: Why does it take me so long? Solder all joints. Add heat shrink tubing. Bundle with wire loom. All permanent joints are done this way (28 in the rear deck alone, not counting the bulkhead connector).

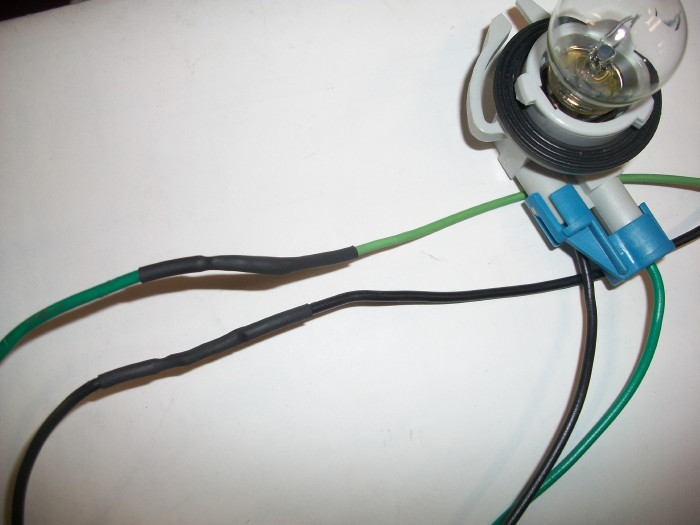
Before and After:

Door latches and rear deck release in place.
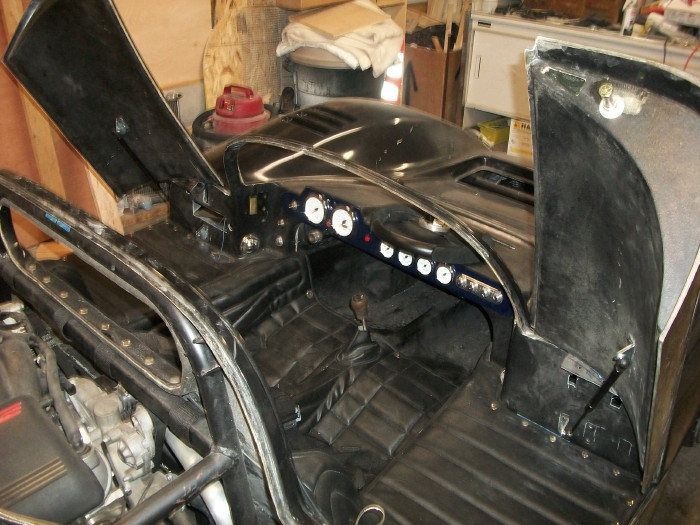
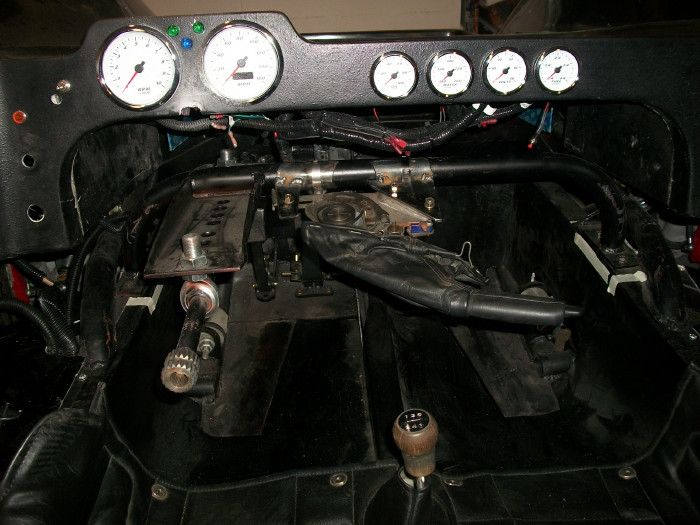
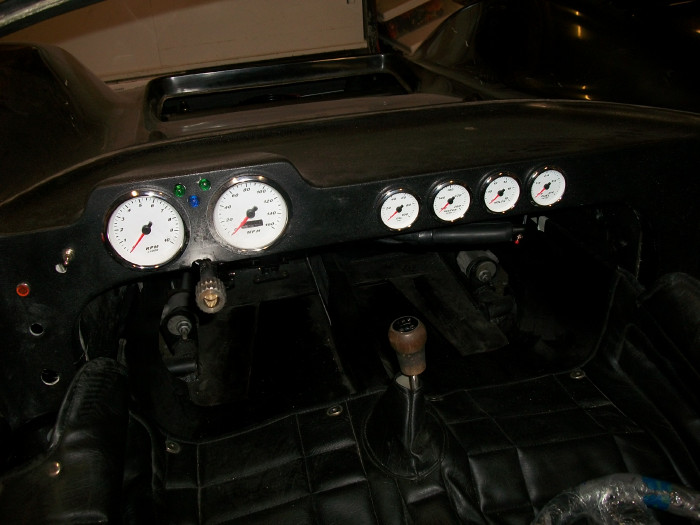
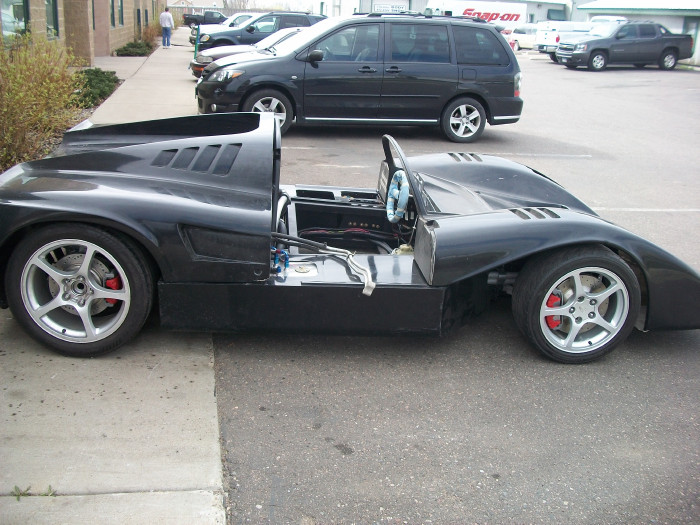
07-03-12 - View from the driver's seat (well, just to the left) with gauges in their final locations. The covered switch is the potential future home of the headlight switch - depending on which style we decide to use. Below the switch is one of two A/C vents. Just to the right of that is the key slot for the ignition, next up is the start button and check engine light above that. Above and to the right a little is the turn signal switch. The horn button will reside a little to the right of the speedo. A/C controls will be on the right side of the dash.

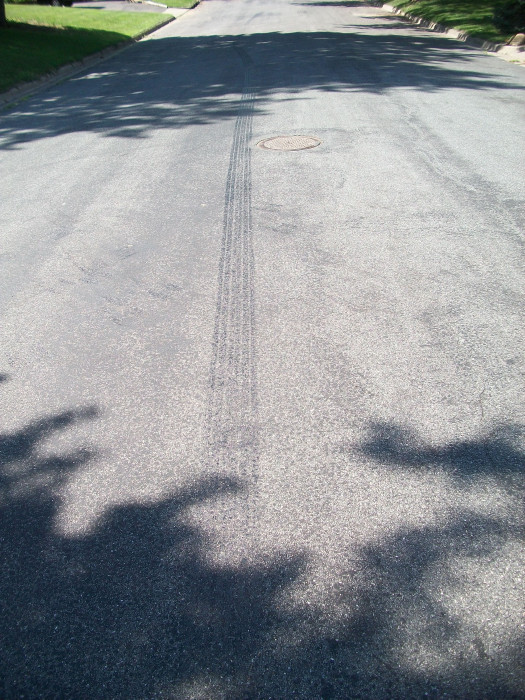
06-30-12 - 135' burnout starting in 2nd gear. Why don't I get these on video???
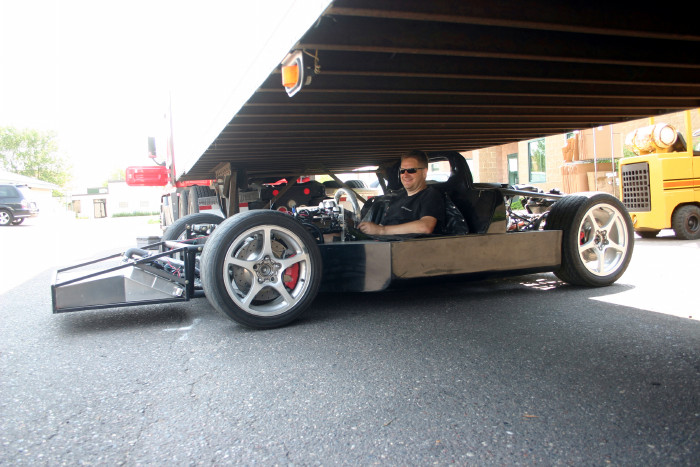
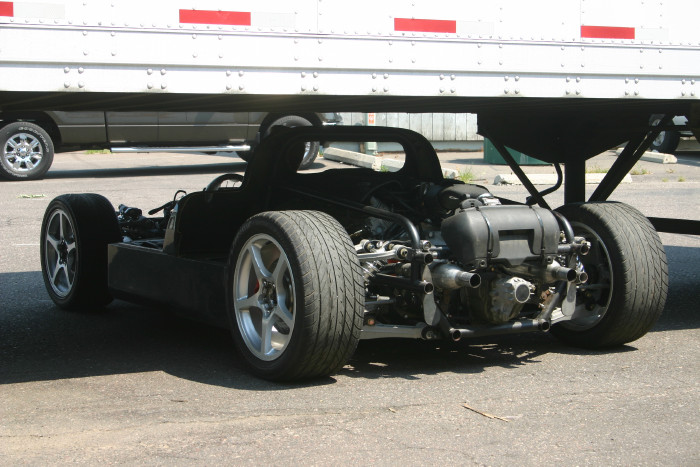
06-28-12 - Big semi parked in your way? No problem. Just slide under and you're on your way! Nothing was adjusted for this drive-under. Everything on the car and semi are stock.
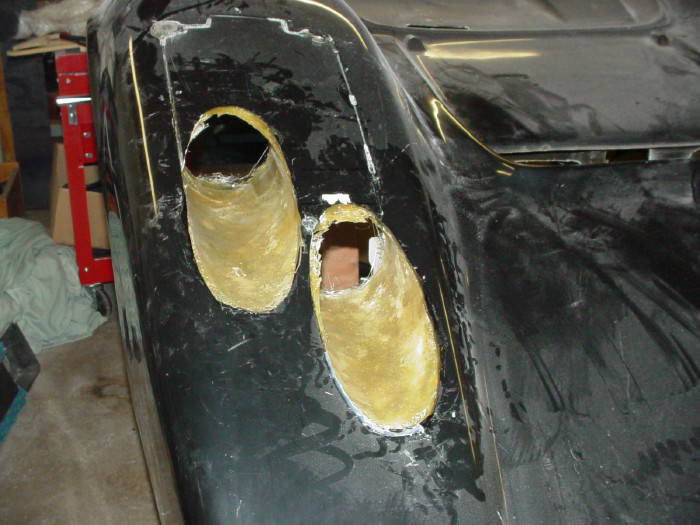
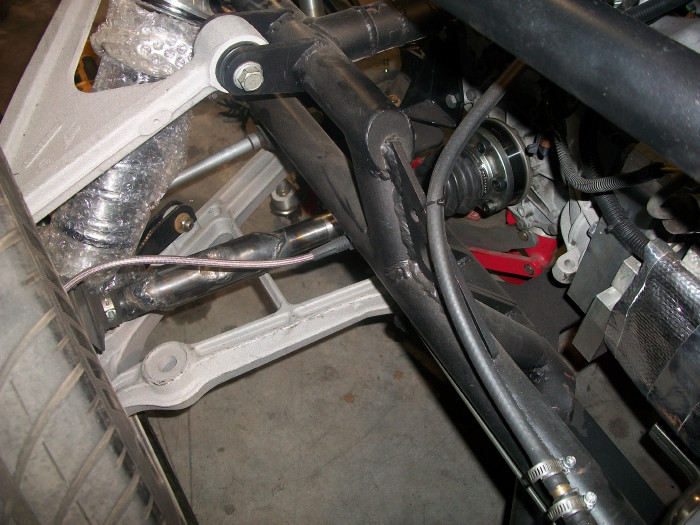
06-19-12 - Further adjustments to the seat belts were first thing on the agenda today. While I was under the car, I spent some time wrapping thermal blanket material around the coolant tubes and secured some more wiring and brake lines. After lunch (didn't want to attempt the next project on an empty stomach) I took several measurements, hauled out the saw, took a couple more measurements, took a few deep breaths, made some marks with tape, took a few more breaths, and ended up with this:
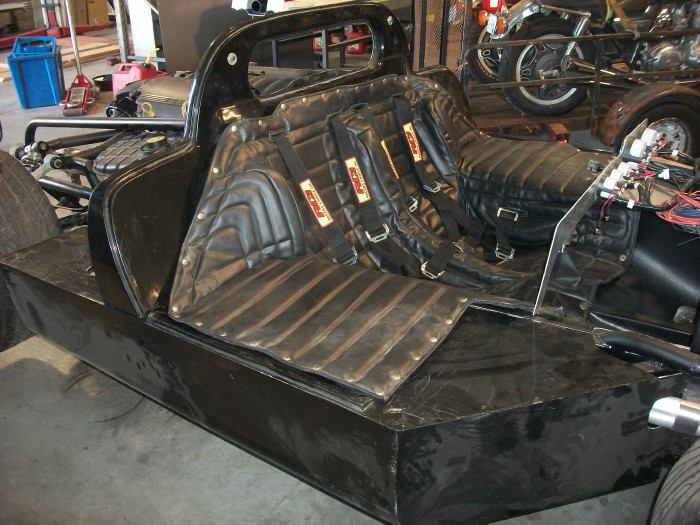
06-18-12 - Safety first! Seat belts installed today.
06-15-12 - Did some final wrapping and securing of the wiring around the engine. Also added some heat shielding around the shift cables. Things are looking just about done back here.
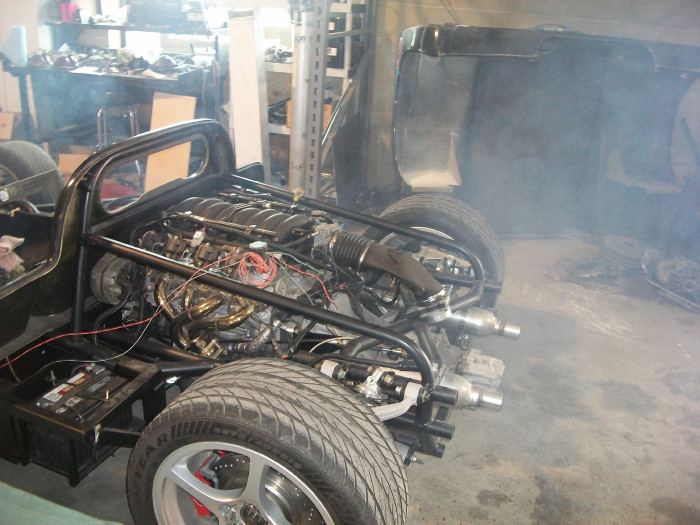
06-12-12 - Did the Mirage catch on fire? Fortunately no. This was exhaust from a jet ski being started in the shop. We really need to test fire these things outside on nice days, or at least learn to open the doors first :).
06-08-12 - Got in some more test driving in the Mirage this week. Lots of quick runs up and down the parking lot, across the street and around another big lot. Shot some in-car video, but mostly got the passenger's head. Maybe we'll try that again. All but one gauge is now reading engine vitals. The final gauge will be hooked up on Monday (waiting on a part). The cooling system is now flowing freely and the fan is kicking on and off as programmed. I'm still assuming that the radiator will need to be replaced with a larger one, but will wait for harder driving to make the final decision.
Took a brief drive this morning to have the car aligned. When the tech and I were doing the once-over, we took some quick camber measurements and determined the driver's side rear wheel was sitting at too much of a negative angle. The remedy would be to cut off the old upper suspension mounts on one side, make new ones, and weld them in at a slightly different angle. I took the short drive back to the shop a bit dejected (highly disappointed and very frustrated is more accurate). Before I started cutting things apart, I decided to make some adjustments to see if I could get around the problem. (So many detailed measurements were taken during the design and initial fabrication stages, I was convinced something was not right with the situation.)
A slight adjustment to the right rear coilover and a few degrees rotation in the lower control arm cam bolt helped a little, but still not as much as needed. I then set about adjusting the toe on the driver's side when I realized things weren't moving as they should. Aha! Here's the problem! The lower suspension mount where the cam bolt rotates had broken free a bit (this is why I avoid welding critical areas). Loosen the cam bolt, squeeze the pieces back into place and have someone else reweld. And just like that the tire came into proper camber.
A quick call over to the alignment shop confirmed they still had a spot for me and off the car went. It will be back some time on Monday. We are hoping to have it on a local racetrack later next week or the week after. Oh, I can't wait.
06-06-12 - Wednesday night brought more drive time in the Mirage and I actually handed the keys over to our resident daredevil. He took it easy but still noted what an absolute thrill the car is to drive even in the restrictive parking lot.
05-31-12 - The weather is much more cooperative this week. Wednesday night the Mirage was finally out for a test drive but the clutch wasn't disengaging. After some tinkering and troubleshooting, the problem was determined to be a too-short rod on the slave cylinder. A new one was quickly fabbed up and installed and problem solved. As a bonus, the rattling previously reported inside the transaxle has also been fixed - with the shorter rod on the slave cylinder, the clutch fork wasn't under any tension/load so it was jiggling around a bit. First thing Thursday morning we got the Mirage out for many laps up and down the parking lot. All systems seem to be working well with the exception of the brakes which are still a bit on the soft side.
05-25-12 - As cool as it would be, the Mirage was not intended to be an amphibious vehicle. The first test drive opportunity was a complete wash-out - 4.5 inches of rain over 18 hours or something like that. With everyone gone for the long weekend and more rain in the forecast, we'll have to wait until next week.
05-22-12 - Axles are finally in the car, shift linkage is complete and working OK (it's a bit stiff and the shift pattern is tight - will likely need some adjusting as we go), new mufflers installed (the previous ones were in the way of the shift linkage). Over the last couple days a bunch of necessities were mounted or tied down in preparation for the first test drive tomorrow.
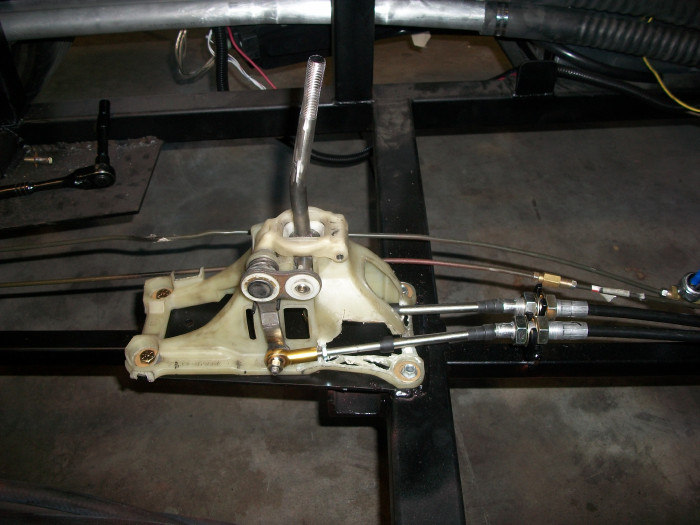
05-05-12 - Progress has unfortunately slowed a little bit between waiting on a couple things and a couple other urgent projects that have come up. The shfiter, cables and transaxle linkage are all in - still needs to be adjusted. The axles are in the process of being modified and will hopefully be done within a week.
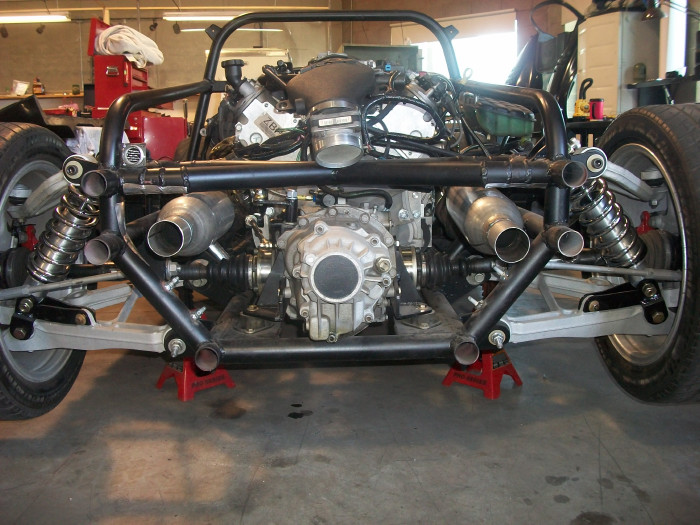
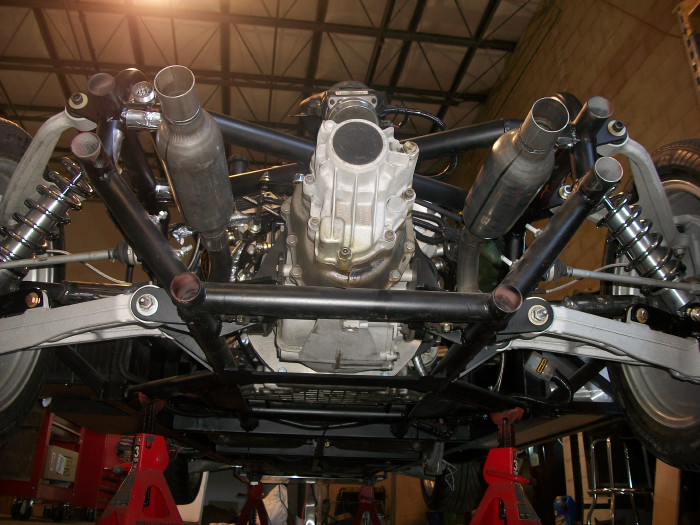
04-21-12 - A couple weeks since the last update, so I'll try to make it up here with a few extra pictures. A couple pictures before the chassis headed off for exhaust.
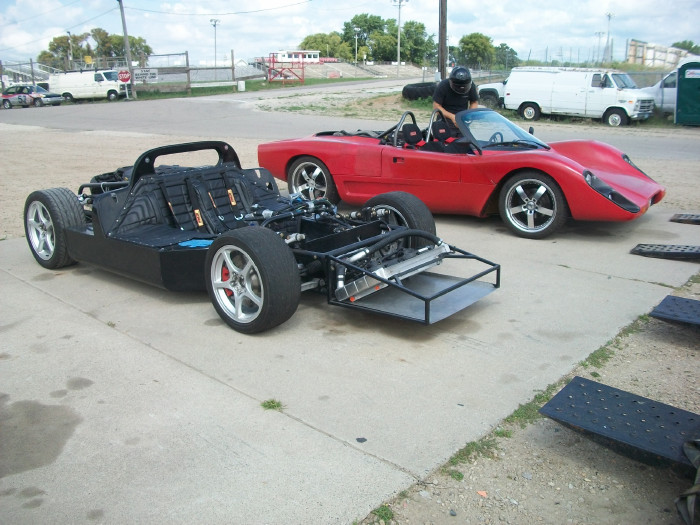
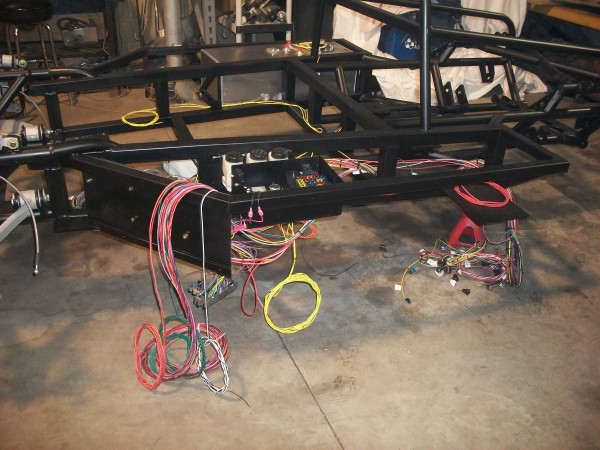
Driver's side storage, fuse panels, and hydraulic reservoir access. The Mirage's first ride on the highway. Even without the body, it got a lot of stares and attention from other drivers.

Back from the exhaust shop. The current mufflers may need to be switched out for a round glass-pack style.
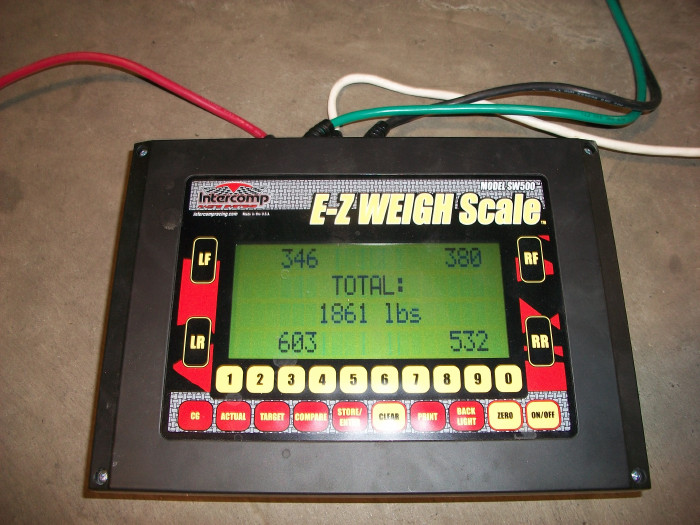
Took some time out to weigh the chassis. That's 1861 lbs. without the body. With the body minus upper doors, t-bar, and windshield, the weight went to 2046 lbs. The final weight will be a few pounds more with some more body work, weatherstripping, sound/heat insulation, etc. added in there. I expect it won't go much past 2100 lbs.
Lots of tedious things going on the past few days - final tidying up of wires, soldering bulkhead connnectors, hiding the stereo antenna, re-cut steering column mount, heat wrap around engine wiring, etc.
One more video of the car idling. We ran it for about 10 minutes to get it nice and hot. The thermostat never seemed to open up (which will result in some investigation) and the check engine light finally came on. I realized later one oxygen sensor was unplugged. The code scanner has gone missing, so I haven't had a chance to pull codes yet. Hopefully it was just the unplugged sensor. The buzzing/humming sound on the video is the fuel pump, which doesn't seem as noisy in person. Hmmm....
04-09-12 - With the quieter exhaust, we can now hear a rattle in the engine. Apparently there is some truth to turning up the car radio to drown out the bad noises. The camera shaking this time is from the exhaust blast which could be felt half-way across the shop! Hydraulics are now full of fluid and in need of final bleeding. Cooling system will be filled in the next day or so.
04-06-12 - Exhaust work is done and the engine sounds great. Unfortunately I forgot to bring my camera to the shop to get some video! There will be quality video Monday afternoon for sure.
03-30-12 - 9:55am CST - IT IDLES!
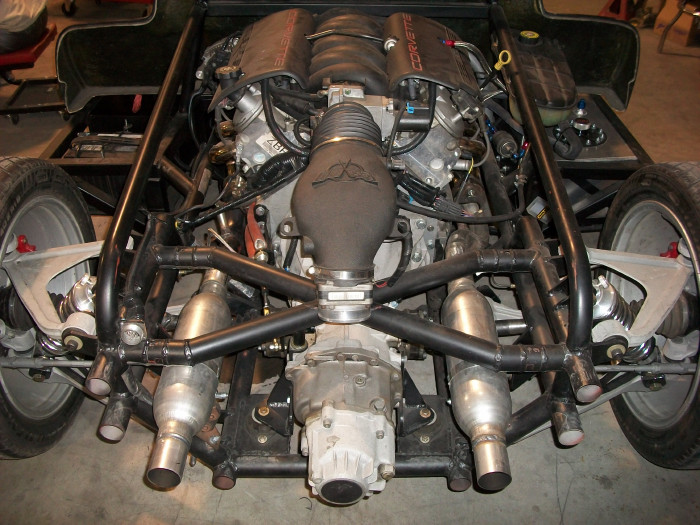
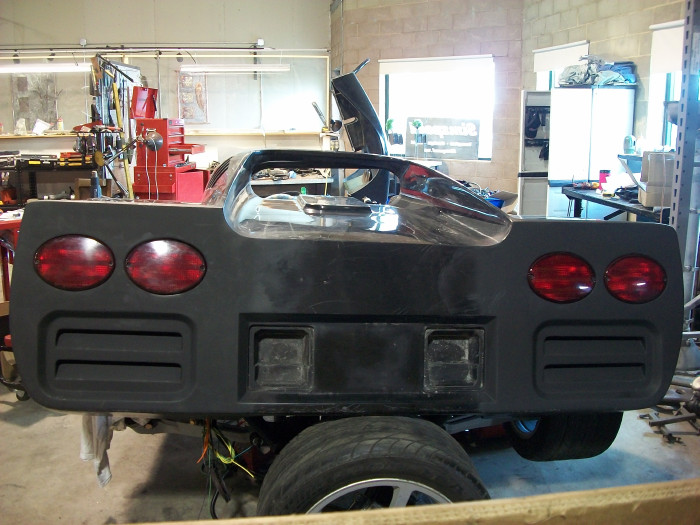
Looking back into the engine compartment and the back end in position with exhaust holes cut.
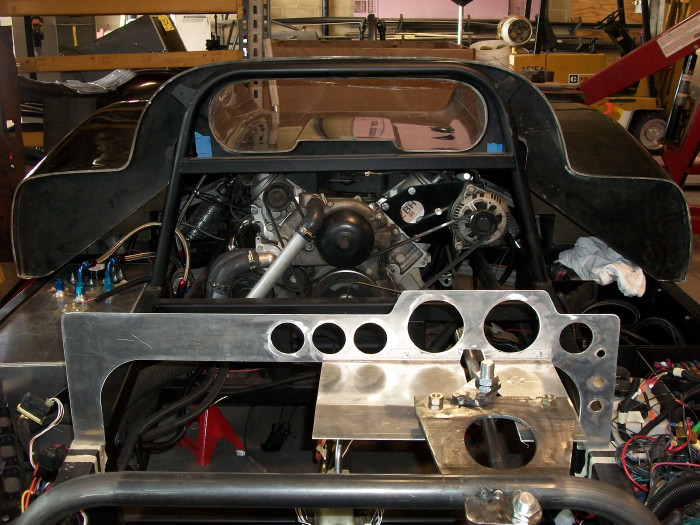
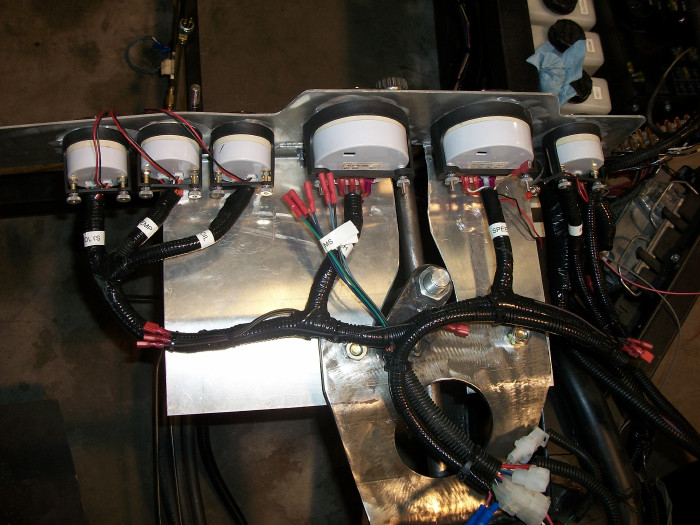
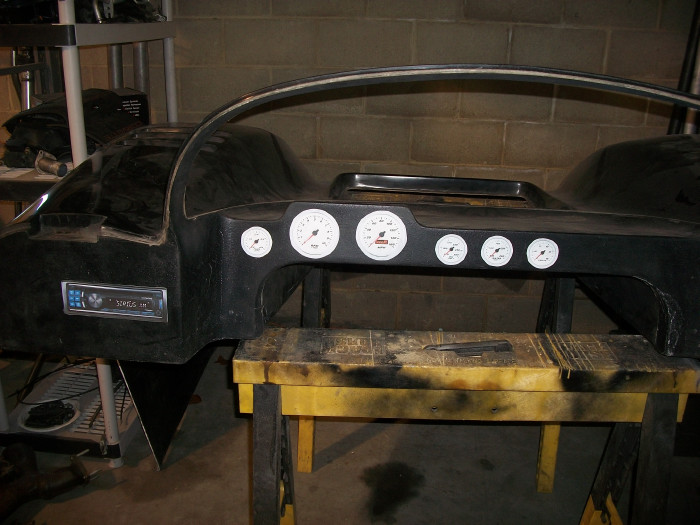
03-23-12 - Tail light modification is done. The plan is for the exhaust to exit where the original tail lights would have been. A new steering column has been mocked up, making it much easier to see the gauges. A few minor changes still need to be made to the dash panel layout, but we'll leave it this way for now. At least we'll be able to tell how fast we're going.
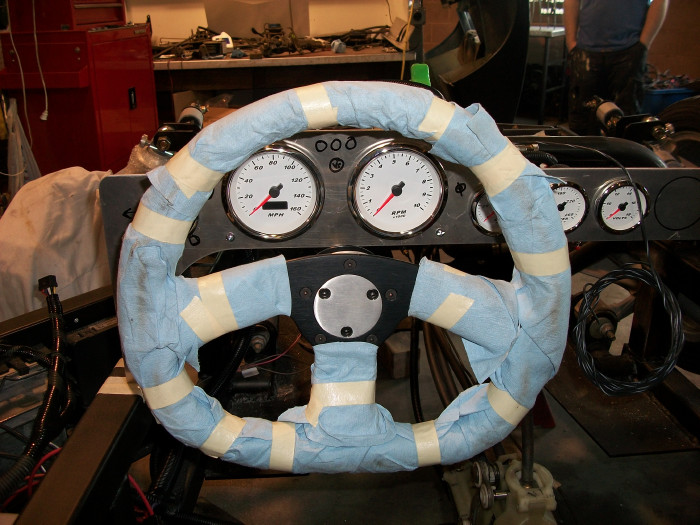
03-21-12 - Playing with the gauges and the view of the dash from the driver's seat. Gotta' be able to see the gauges better - the Corvette steering column needs to be moved up about 2" which won't work unless we eliminate the gauges or move everything on the passenger side.

03-17-12 - 7:45am CST - IT LIVES!!
(Sorry for the shaky camera work. Pushing buttons, the throttle and running the camera simultaneously isn't the easiest thing to do.)
03-16-12 - Work the past few days has focussed on more wiring and a new dash panel. The panel will stay with the chassis when the front body is removed. This will allow the car to be easily driven and tested without body work and it makes for removing the front a lot easier. Planning on trying to fire the beast up tomorrow morning. Stay tuned...

03-14-12 - Tonight we hooked up a few more wires and gave the engine a brief crank. No fuel or coolant in the system. This was just to test some electrical connections.
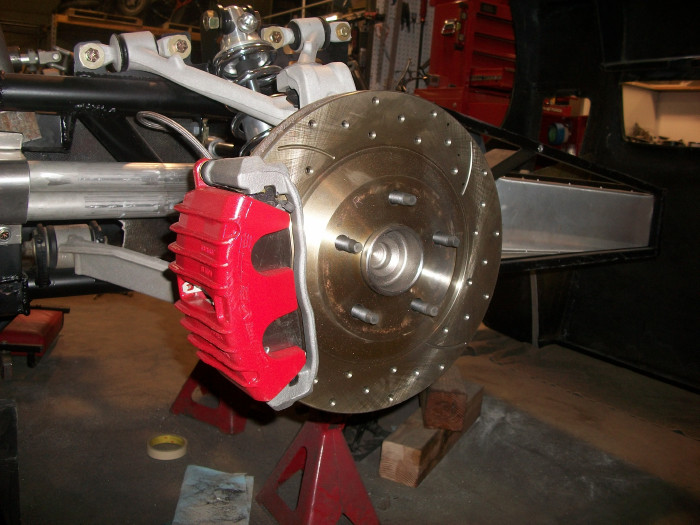
03-09-12 - 3 of the 4 calipers are now powdercoated and mounted. A Vintage Air Heat/AC/Defrost unit is mounted in the passenger side pod. The Corvette steering column has been shortened and seems to be working so far. A smaller steering wheel and quick disconnect hub are on order and will arrive next week. Once they are fitted to the column, we'll be able to more accurately test the fit of a driver. The rear body is off-site being modified for new tail lights.
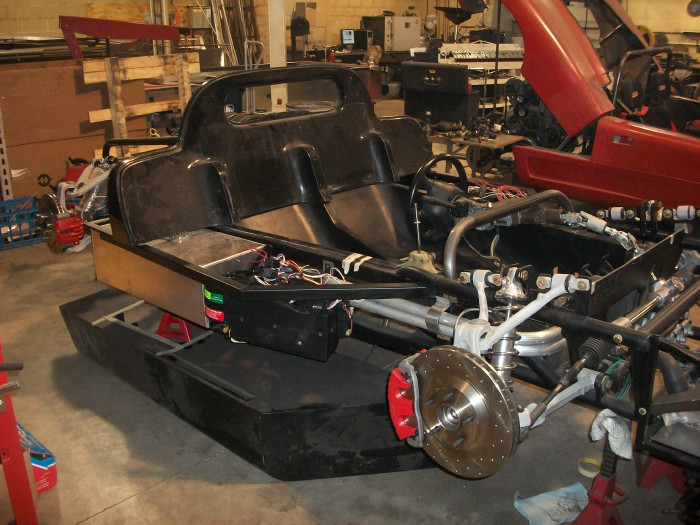
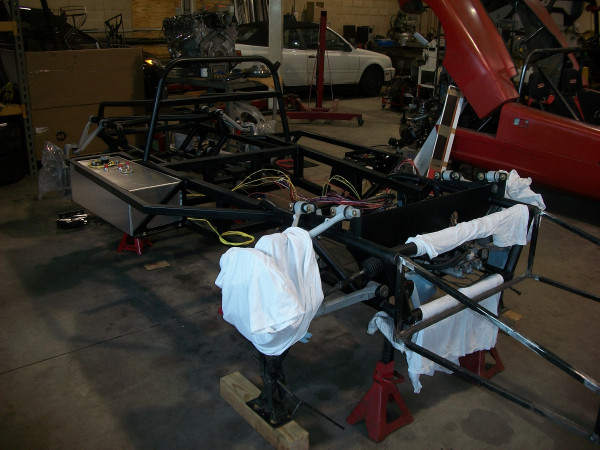
03-01-12 - Shocks mounts are completed and the shocks are bolted in the frame. The Mirage will finally be sitting on its own tires rather than the support of jackstands. Axles are in place checking for clearance issues - the back end looks almost ready to go! Mocking up the steering column and still hoping to use the Corvette unit with some modifications. Oh, and a new serpentine belt has been installed :).


02-23-12 - The PCM has returned from reprogramming and is permanantly mounted, getting us a bit closer to firing this thing up. Shocks arrived last week and the fronts are mounted in the chassis. New brackets had to be fabricated for the rear lower mounts, which will be installed early next week after finish welding and powdercoating. More wiring work in the last few days as well as some tweaks to the hydraulics. Also playing around with dashboard layout.
02-10-12 - Engine wiring is run and tucked away in looms (final taping and securing yet to come), shifter is in position, cooling lines are run, and fuel lines are almost finished. Also, the ECM has been sent off for reprogramming.
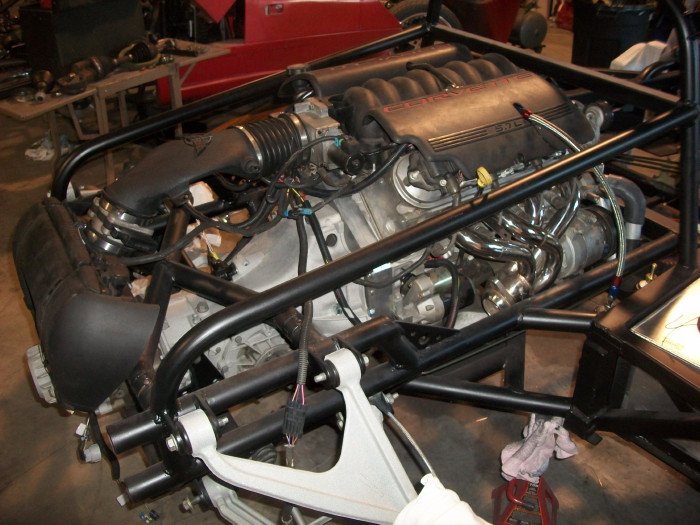
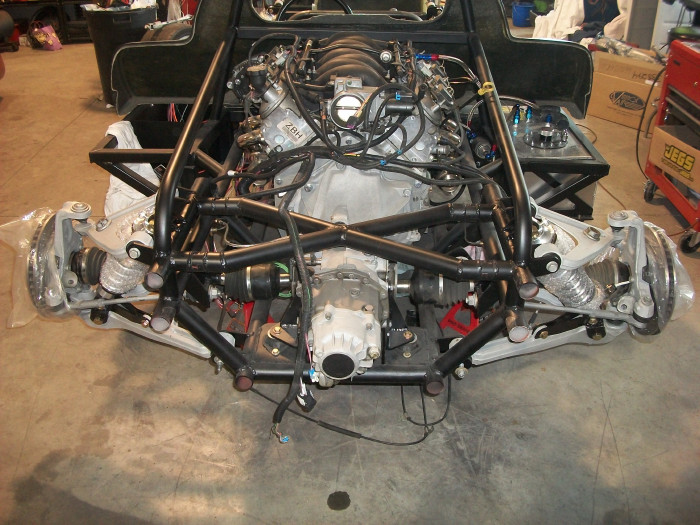
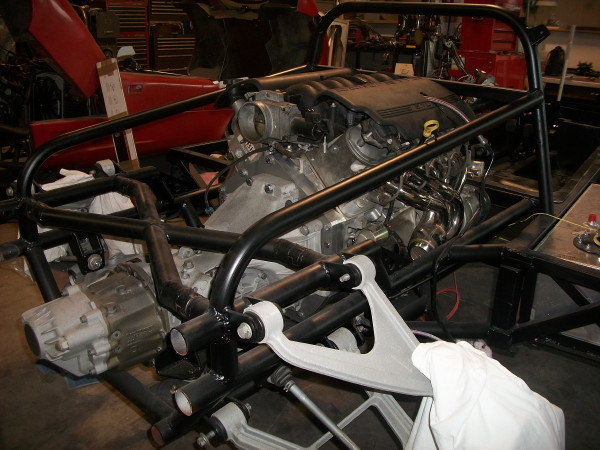
02-03-12 - The engine is finally back in the frame, hopefully for the last time. Along with rotating the intake 180 degrees, the valve covers and a couple other bits swapped sides to help everything connect better.

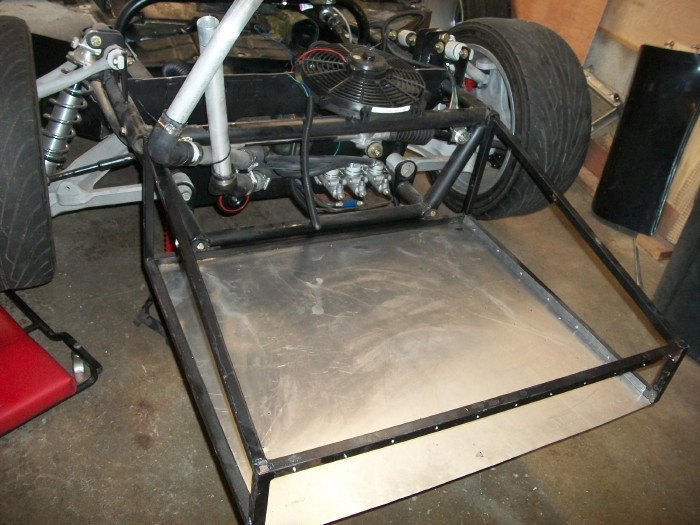
01-27-12 - Radiator duct just about finished.

01-22-12 - Keeping the goodies covered up. You never know what prying eyes might be in the shop.
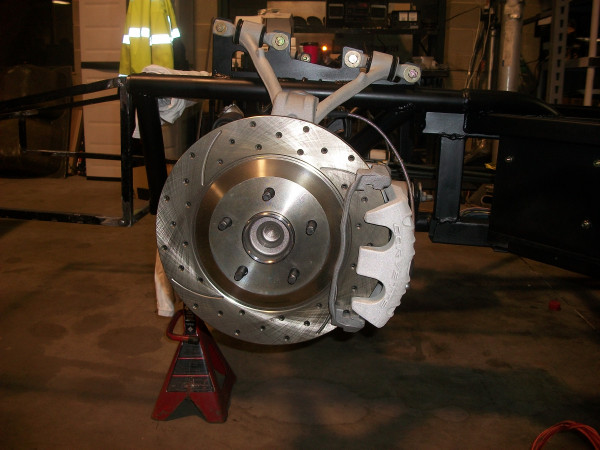
01-19-12 - Working on wiring and test fitting new brakes.
01-16-12 - New headers. The transaxle is all cleaned up and ready to install.


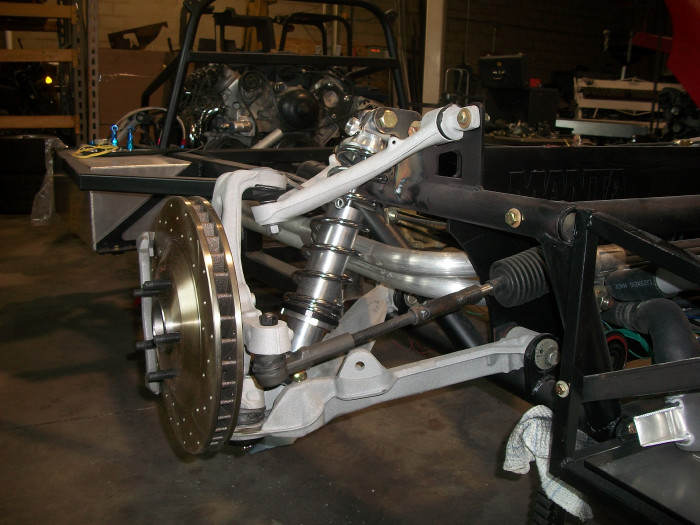
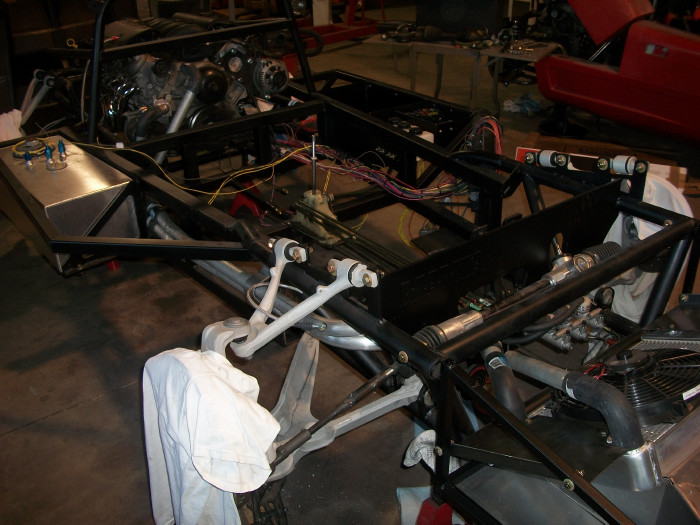
01-13-12 - Suspension is being mounted on the frame for the final time. The flash from the camera makes the pieces look white against the black frame.
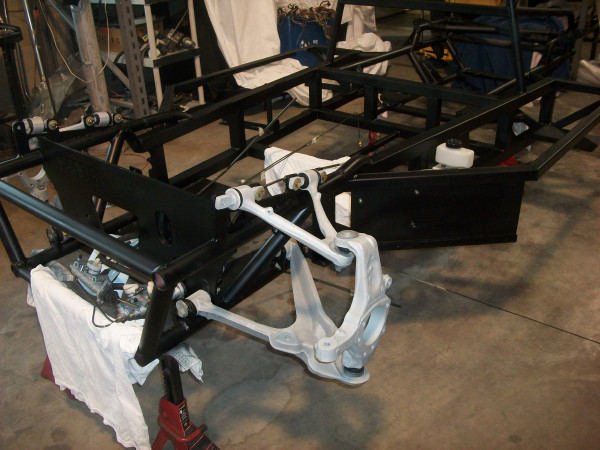
01-10-12 - Suspension pieces are clear-coated and the frame is all painted and ready for assembly.


Most recent photos at top. Keep watching for updates to come...
Older entries click HERE